Weblearn Login Changes
From 27 August, Weblearn will use the same sign-in process as other University services, such as Email, e:Vision and Microsoft 365.
Current Login (username only)
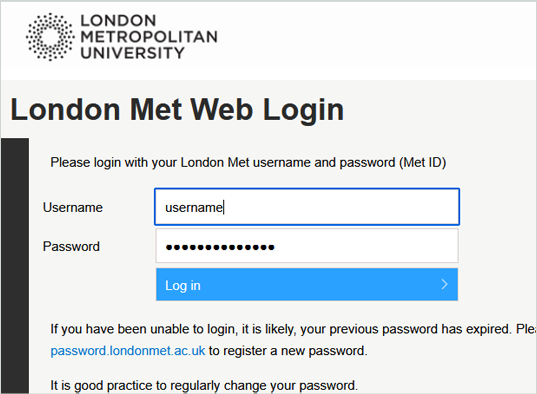
Moving to London Met Microsoft login
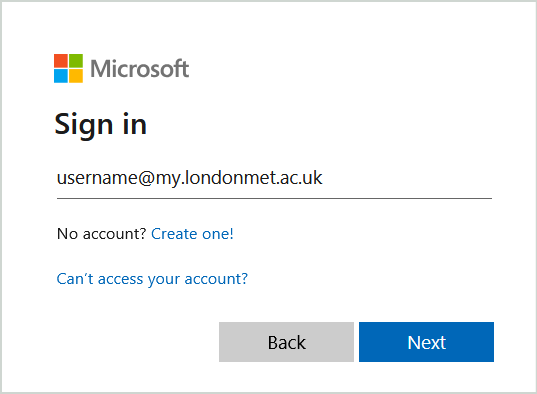
What’s changing?
When you sign in to Weblearn, you’ll no longer use just your University username and password.
Instead, you’ll sign in with your London Met Microsoft login:
- Student: username@my.londonmet.ac.uk
- Staff: username@staff.londonmet.ac.uk
For example, if your username is abc123, you will sign in as:
- Student: abc123@my.londonmet.ac.uk
- Staff: abc123@staff.londonmet.ac.uk
Your password will remain the same, but you will need to complete Multi-Factor Authentication (MFA) when prompted.
Why is this changing?
Moving Weblearn to the University’s Microsoft sign-in system provides:
- A more consistent login experience across University services.
- Improved security through Multi-Factor Authentication (MFA).
- Better protection for your University account and data.
Visit the IT Help and Support page if you experience any login issues or need help setting up MFA.
To access London Met systems that use the Microsoft login you will need to set up Multi-Factor Authentication (MFA) using the Microsoft Authenticator.
For more information on MFA, see Multi-Factor Authentication | Student Zone
What you’ll need to set up MFA
Two devices:
- A mobile phone
- A second device like a laptop or tablet
Your mobile phone needs to be running one of these versions:
- Android 8.0 or later
- iOS 15 or later
- Windows 10 Mobile 14393.0 or later
Correct London Met Microsoft login:
- Student: username@my.londonmet.ac.uk
- Staff: username@staff.londonmet.ac.uk
Up-to-date version of Microsoft Authenticator app on your phone:
If you already use the authenticator app, you can add your London Met Microsoft account to your existing app.
To download the Authenticator on your mobile device, go to your app store and search for ‘Microsoft Authenticator’, or use a below link to go directly to the download page.
- iOS App Store (Apple devices)
- Google Play (Android devices)
Install the app on your device.
Set up MFA using the Microsoft Authenticator
Video and Quick Step guide
Watch a 4 minute video showing how to enable MFA using the Microsoft Authenticator.
On your phone:
- Make sure you have an up-to-date version of the Microsoft authenticator installed
On your laptop or other device:
- Open a browser
- Log into login.microsoftonline.com with your London Met Microsoft username and IT password
- Follow the prompts until you’re instructed to ‘Set up your account in the app’
On your phone:
- Open the Authenticator app
- Click the plus (+) button to start adding your account
- Select ‘work or school’ account
- Select ‘Scan a QR code’
On your laptop:
- Click the Next button to get the QR code
On your phone
- Scan the QR code showing on your second device
- Take note of the number that appears on your laptop
- Type the number in the Authenticator and confirm
On your laptop:
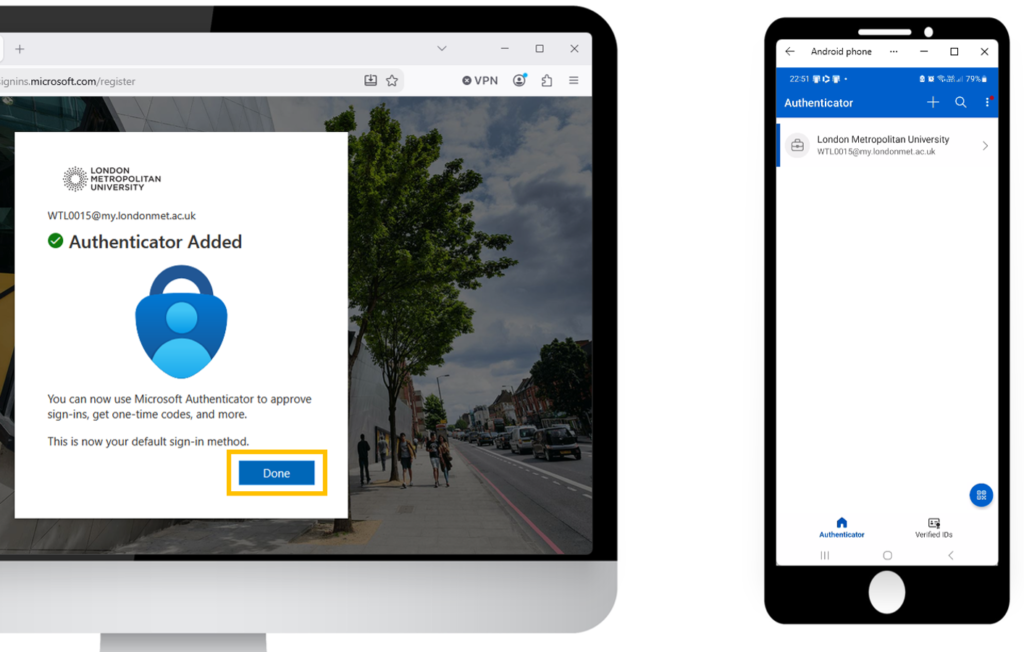
- The ‘Authenticator Added’ message appears. Click on ‘Done’.
Step-by-Step Guide
- Before you start, make sure the Authenticator is installed on your phone.
- Log into your Microsoft account on your laptop or tablet.
Open a browser on your laptop or tablet and go to login.microsoftonline.com
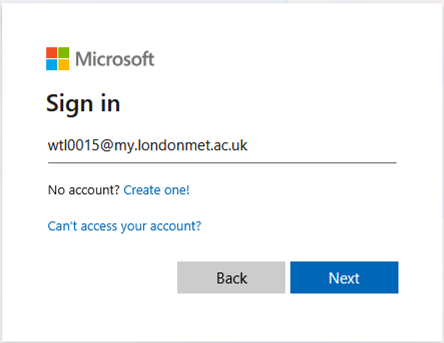
- Enter your London Met Microsoft login
- Click Next
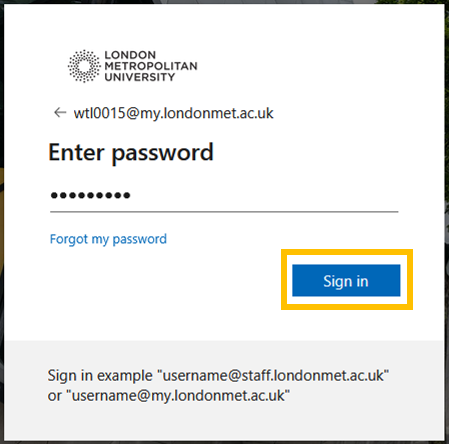
- Enter your IT password
- Click ‘Sign-in’
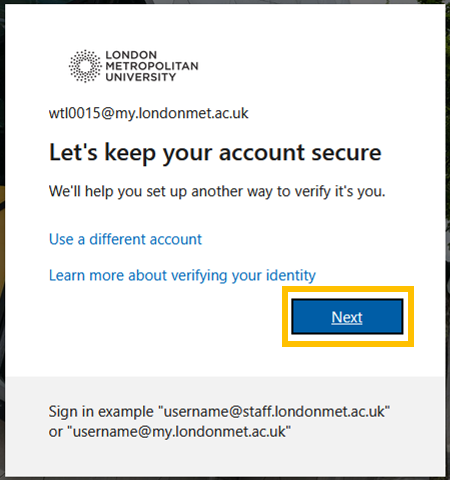
You’ll see an ‘Keep your account secure’ message
- Click ‘Next’
- Click ‘Next’ again when you see a reminder to install the Microsoft Authenticator
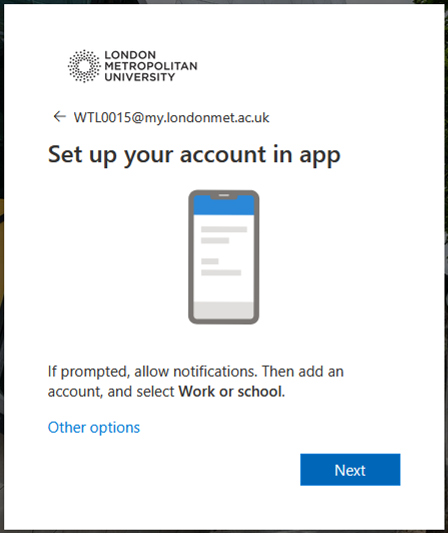
You’ll see a ‘Set up your account in app’ message.
- Return to your phone
- Set up the Authenticator on your phone
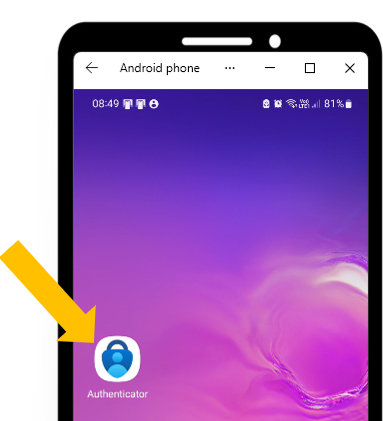
- Open the Authenticator app
If prompted, click accept and allow notifications.
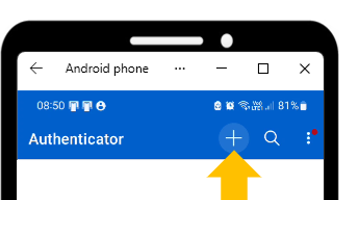
- Click on the plus (+) icon to add your account
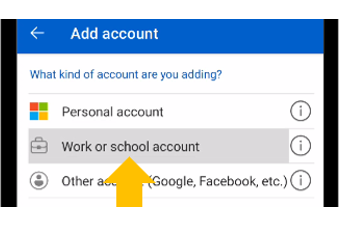
- Click on ‘Work or school account’
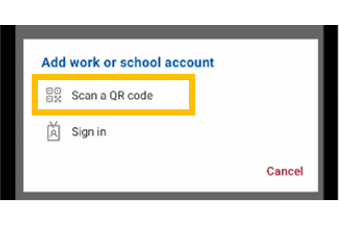
- Click on ‘Scan a QR code’
If prompted, allow the app to use the phone’s camera.
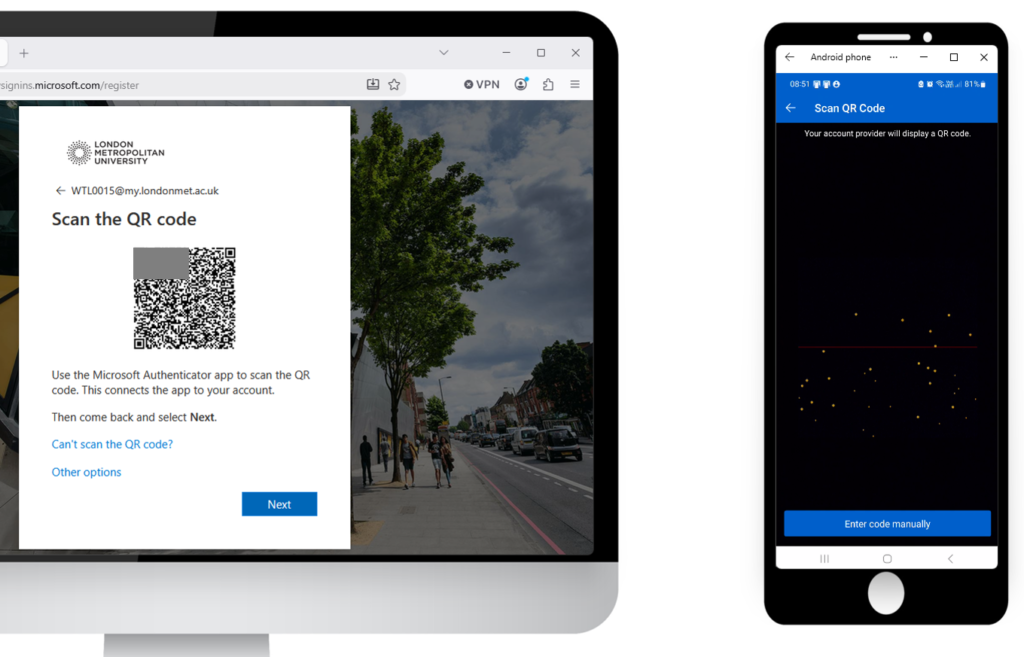
- Scan the QR code to link your account to the authenticator
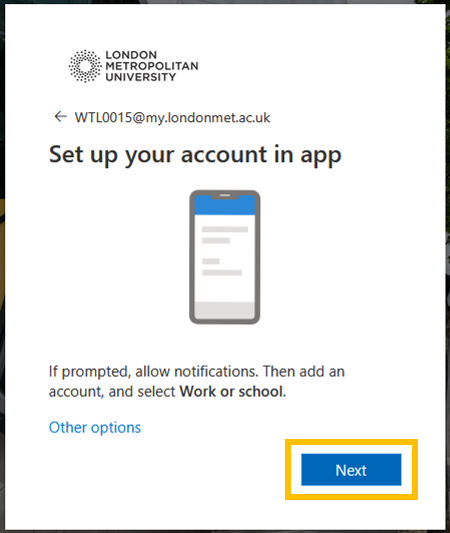
- Go back to your laptop
- Click ‘Next’ on the Set up account screen
The QR code will appear on the laptop screen.
- Use you phone to scan the QR code.
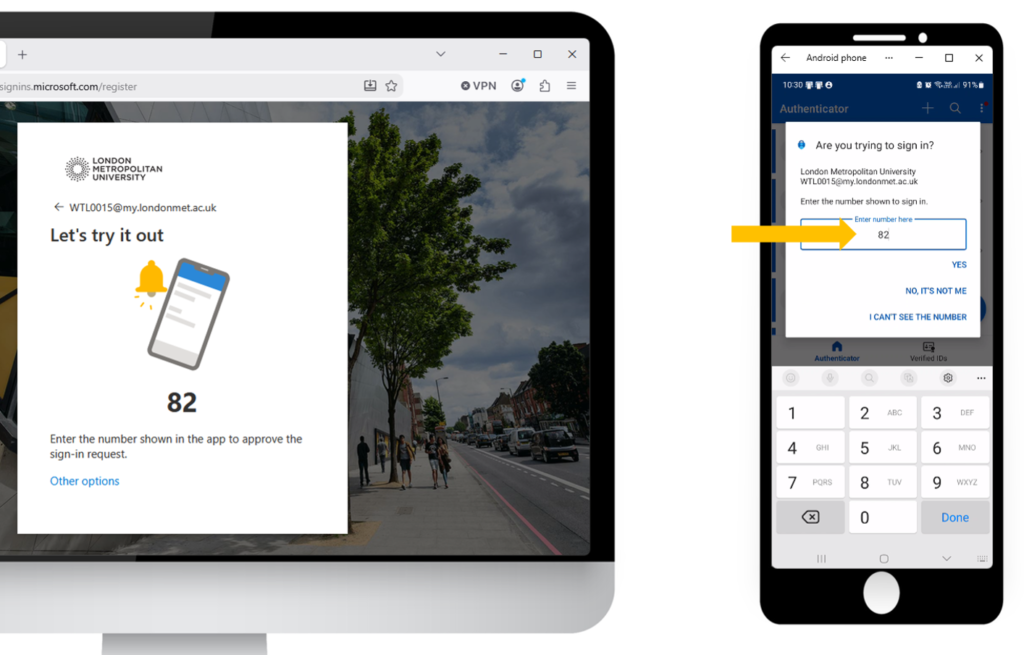
- Match the numbers to confirm your account set-up
Note the number that appears on your laptop.
- Type the number in the authenticator and confirm.
- Click on ‘Done’. Your authenticator will now show your account and is ready to use for the next time you need it.