
All modules which are approved for PebblePad use will have PebblePad pre-enabled.
To create a workspace on Pebblepad you will need to:
- Add a PebblePad link to the Weblearn module
- Edit the link settings
- Create the PebblePad workspace
View the PebblePad overview video: Set up PebblePad Assignment
Prerequisite:
- You must have Instructor access to the Weblearn module
- You must have the ‘Creator’ role assigned to your account in PebblePad
Add a PebblePad link to the Weblearn module
- Click on the plus (+) icon on the module content panel and then select ‘More Tools’

- Select the plus (+) icon on the ‘PebblePad and ATLAS’ tile

The PebblePad and ATLAS link will appear on the module and it is hidden from students by default.

Edit the link settings
The the link setting need to be updated to ensure that the link can be access by students and that the link title and description are meaningful to students.
- To edit the link, click on the three dots to access the link options and then select ‘Edit’
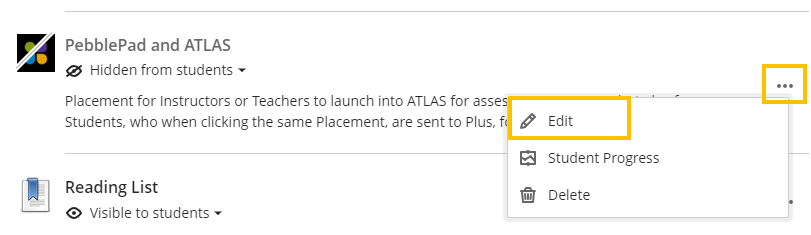
- Update the name of the link

- Click on the ‘Hidden from students’ drop down menu and then select ‘Visible to students’

- Edit or remove the text from the description
- Click on ‘Save’ to confirm the changes

The edited link will be visible to students.
Create PebblePad Workspace
- Click on the PebblePad link in the Weblearn module
You will be directed to the ATLAS Create Workspace page for the module.
- Leave the ‘Create a brand new workspace’ option selected and then select ‘Continue’

The Title of the workspace will be auto populated with the name of the module the workspace will be linked to. Do not change the title of the workspace.
Optionally, add a workspace description.

- Change the ‘Choose which mode the workspace should start in:’ to ‘Active Mode’.
- Click on ‘Finish’
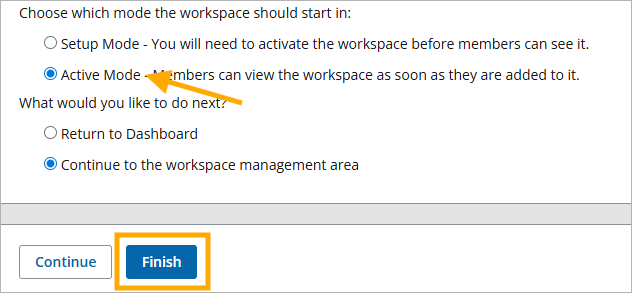
The workspace will now be created.