
This guide covers how to create a PebblePad assignment which is linked to a Weblearn module.
To set up a PebblePad assignment you will need to:
- Create a PebblePad and ATLAS link in the Weblearn module
- Edit the PebblePad link settings to create a Gradebook column
- Edit the Assignment settings on PebblePad
- Add a Resource for submission to the workspace
Prerequisites:
- PebblePad workspace has been created
- The resource for submission is available in your account
Add a PebblePad link to the Weblearn module
- Click on the plus (+) icon in the relevant assessment component folder and then select ‘More Tools’
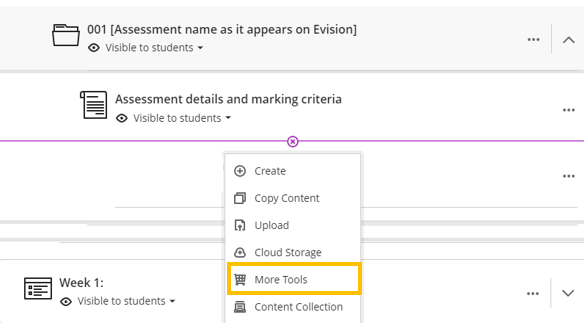
- Select the plus (+) icon on the PebblePad and ATLAS tile

The PebblePad and ATLAS link will appear on the module content panel and it is hidden from students by default.
Edit the link settings
The the link settings need to be updated to create a Gradebook column in the Weblearn module and ensure and that the link title and description are meaningful to students.
- To edit the link, click on the three dots to access the link options and then select ‘Edit’
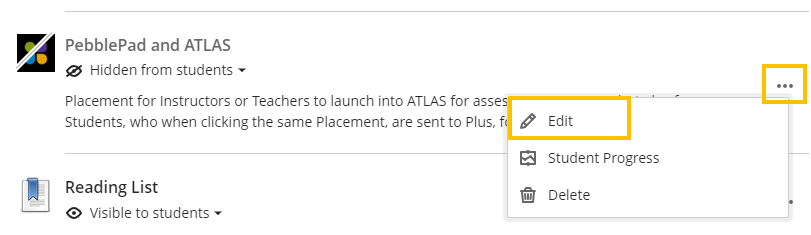
- Update the name of the link so that the name matches the assessment component name as shown on Evision

- Click on the ‘Hidden from students’ drop down menu and then select ‘Visible to students’

- Tick ‘Create gradebook entry for this item’

- Enter the due date for the assessment as shown on Evision and set the due time to 15:15

- Edit or remove the text from the description
- Click on ‘Save’ to confirm the changes

The edited link will be visible to students

The Gradebook column for the assignment will appear in the Gradebook
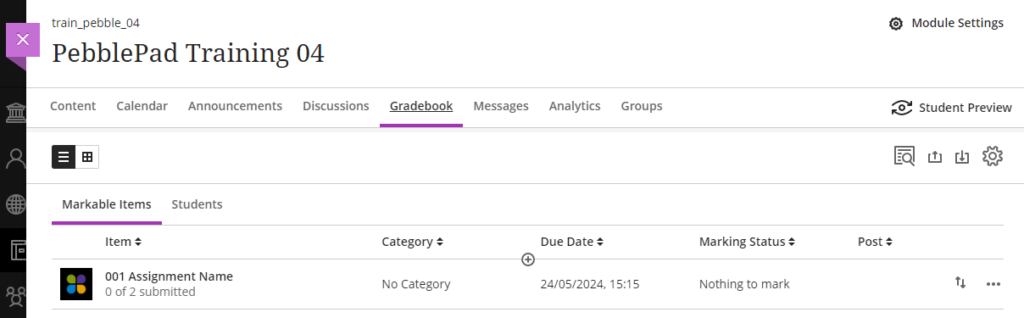
Edit the Assignment settings on PebblePad
Most of the assignment settings can be left as default, but to avoid students submitting the wrong asset and/or accidently removing their submission you will need to change the settings as described in steps 8 and 10 below.
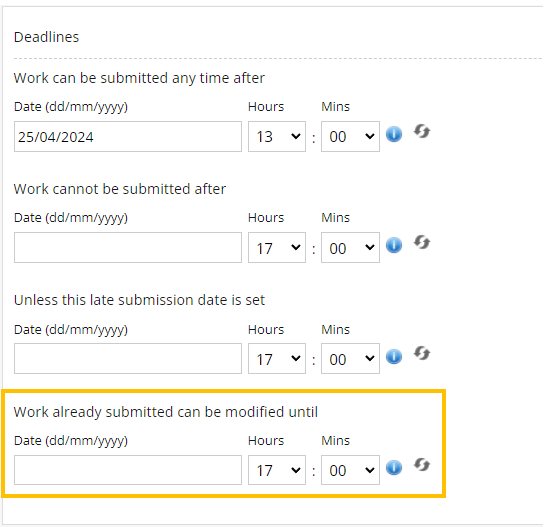
For summative assessments Deadline dates must be configured to prevent students from modifying the submission after the due date as specified on Evision.
- Open the PebblePad workspace by clicking on the PebblePad link in the Weblearn module and then select ‘Management’ > ‘Assignments’
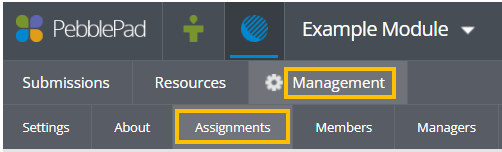
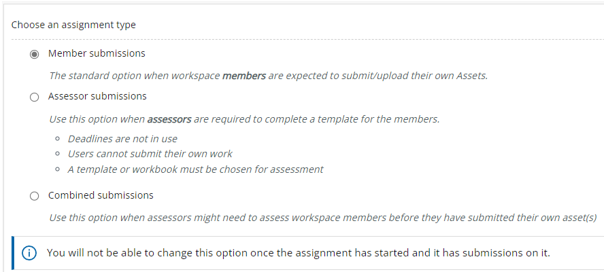
- Leave the default ‘Member submissions’ selected
- Leave ‘Submission Viewer 2’ selected

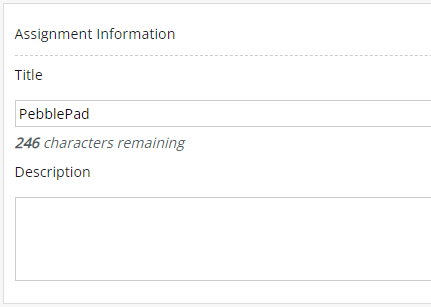
- The ‘Title’ of the assignment will be the same as the name of the PebblePad link added to the Weblearn module. Leave the prepopulated title.
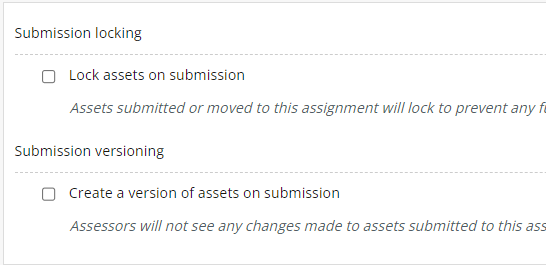
- Do not select ‘Lock assets on submission’ or ‘Create a version of assets on submission’
- Set the ‘Work already submitted can be modified until date’ to the due date for the assessment as shown on Evision and set the due time to 15:15.
Note: Students can continue to modify the resource after the date set, but the modified version will not be visible on the submitted version.
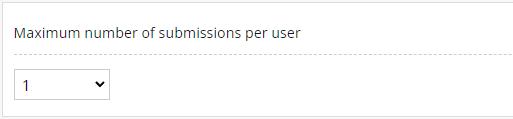
- Leave the ‘Maximum number of submissions per user’ set to one. This will prevent students from submitting the same workbook multiple times.
- Select ‘Restrict submissions to specific Asset types’ and then select the type of asset they need to submit. This will prevent students from submitting the wrong asset for assessment.

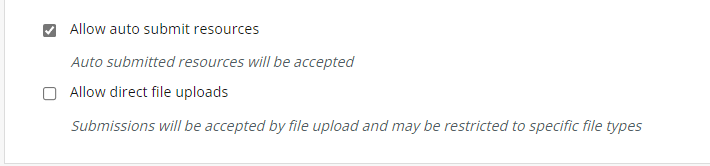
- Leave ‘Allow auto submit resources’ selected and do not select ‘Allow direct file uploads’
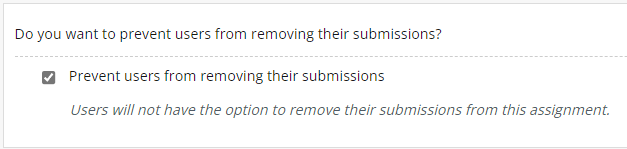
- Select ‘Prevent users from removing their submissions’ to prevent students form accidently removing their submission.
Note: when a submission is removed from a Workspace any grades and feedback added to the submission will be lost.
- Click on the ‘Save’ button to confirm the changes.
Add a Resource for submission
View the PebblePad overview video: Add Resource to Assignment
- Open the PebblePad workspace by clicking on the PebblePad link in the Weblearn module
- Click on the to the ‘Resources’ tab

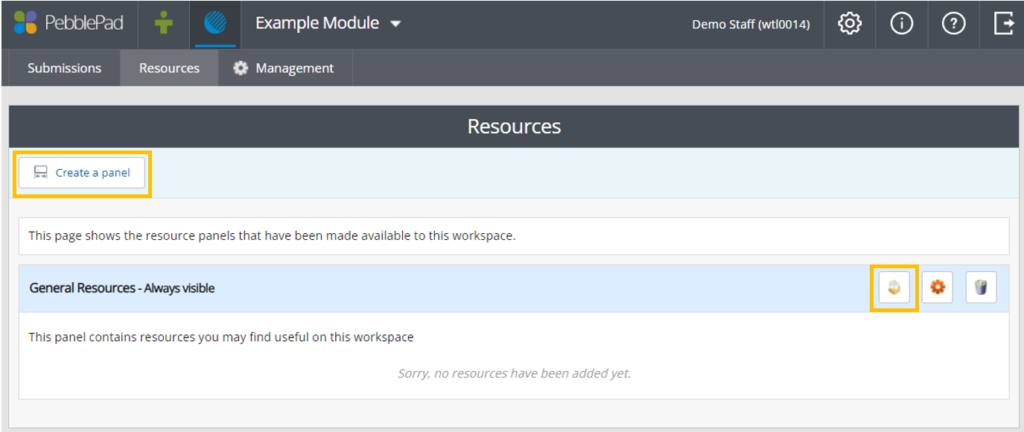
- On the resources page, either ‘Create a panel’, or select the ‘Add resource’ icon on the ‘General Resources’ panel
- On the ‘Add resource’ page, locate the resource to which students should submit to the Workspace
- Click on ‘Select item’
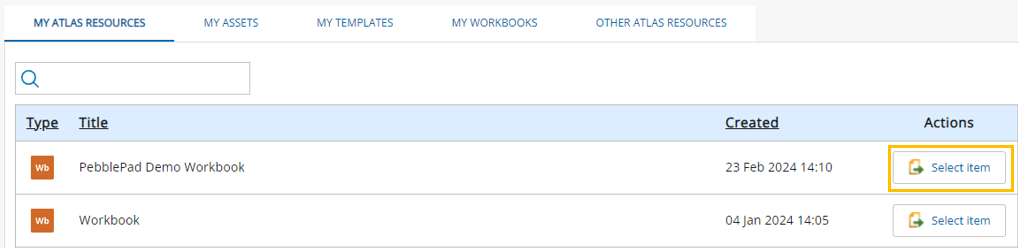
- On the ‘Manage the selected template page’ set the following:
| Setting | Recommendation |
|---|---|
| How would you like to refer to this in the resource panel: | Leave default option: Refer to this resource on this Workspace using its existing title and description |
| Would you like to prompt the user to auto-submit the workbook when saved? | Yes: if using an Auto Submit Assignment No: if the student will only submit the asset once it has been completed |
| Make this resource the destination for the VLE/LMS link? | Yes |
| Would you like to allow other people to use this resource on their workspaces? | No |
| Would you like to allow a user to complete this WorkBook in ATLAS? | No |
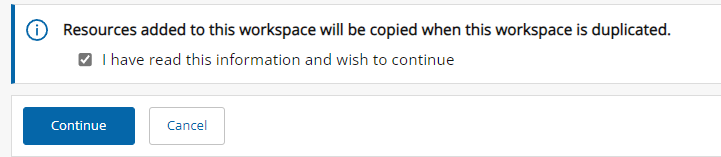
- Once you have set the above options, tick to confirm that you know the workspace resources can be copied if the workspace is duplicated.
- Click on ‘Continue’ to complete the set up process
The assignment will now be ready for the students to use.
Create Additional Assignments
To create an additional assignment you will need to return to the Weblearn module and start the create assignment process again:
- Create a PebblePad and ATLAS link in the Weblearn module
- Edit the PebblePad link settings to create a Gradebook column
- Edit the Assignment settings on PebblePad
- Add a Resource for submission to the workspace
If you are using an auto-submit resource you need to ensure that the correct assignment is selected from ‘Choose and assignment to publish the resource to:’ dropdown menu in step 4 when you add a resource for submission to the workspace.
