Microsoft Education is now available on Weblearn, replacing the previous Teams Meeting integration. The new Microsoft Education tool includes option to:
Create a MS Teams meeting
Share a Class Notebook (OneNote)
Share a Collaborative document
Upload an editable document to Weblearn
The option to create a team is still available if needed.
Access Microsoft Education
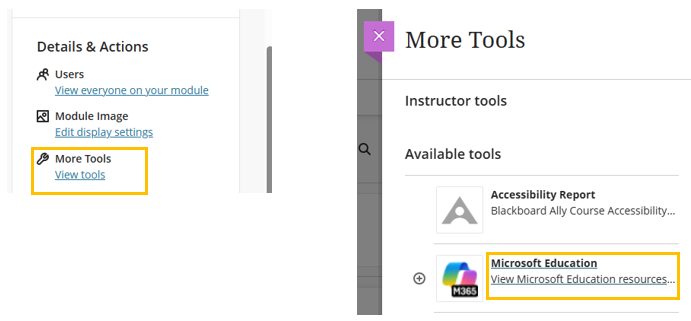
MS Education is located under ‘More Tools’ in the ‘Details & Action’ menu of your Weblearn module. Both staff and students can access the tool and available options from this location.
Note: There is no direct link on the Details & Action menu of the module, but a link can be added to the module content page when needed.
To access MS Education go to the ‘Details & Actions’ menu > click More Tool: ‘View tools’ > click ‘Microsoft Education: View Microsoft Education Resources’
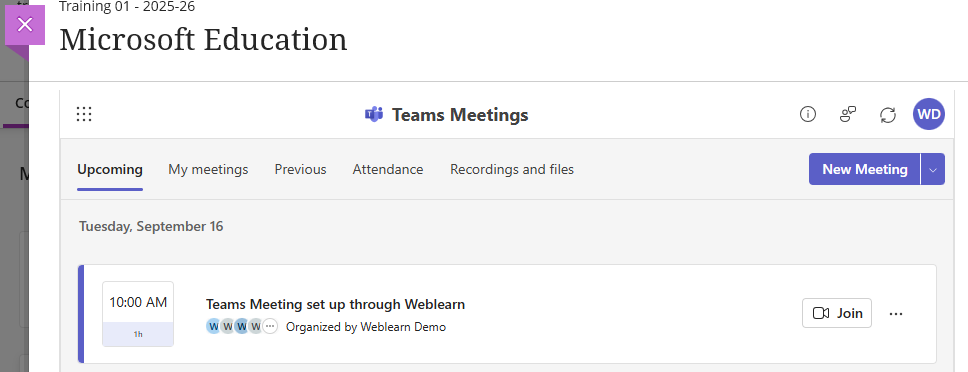
Once users click on the Microsoft Education link, they will see the options available to them.
Microsoft Teams meeting
The new integration automatically creates a group for the module cohort that can be used to send invites to online meetings to students.
Users can access the meeting through the Microsoft for education link, their personal Outlook calendar, or a meeting link added to the module.
Class Notebook
A class notebook is a One Note document that is available to all students on the module cohort and contains:
A collaborative space for notes that all users can edit
A content library for documents shared by instructors
A Teacher only section only visible to instructors
Private student notebooks where students can edit their own contents and share with an instructor, but can’t view other students’ notebooks
Students can access the Class Notebook through Microsoft Education tool or a link added to the module.
Class Notebooks can be used for collaborative learning and formative activities such as development e-portfolios or similar.
Share Collaborative documents
Word, Excel and PowerPoint files can be added to a module as Collaborative documents that can be edited by all students.
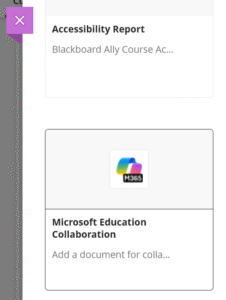
Create a link from ‘More Tools’ in the location where you want to add the document
Select Microsoft Education Collaboration and select the type of document you want to add.
Students can access and edit the document for shared content creation, group work, tutorial tasks or any other collaborative activities suitable for a module.
The new Design Assistant is now available on all Ultra modules on Weblearn. The Design Assistant creates suggested content based on information provided by instructors and can be used to generate
A content generation link or button will appear on all Weblearn tools for which the design assistant has been enabled. The design assistant uses Microsoft AI to generate content based on a module’s title and any description provided by the instructor.
The instructor clicks on an ‘auto-generate’ link, reviews the suggested content and decides whether it is appropriate to use for their module delivery.
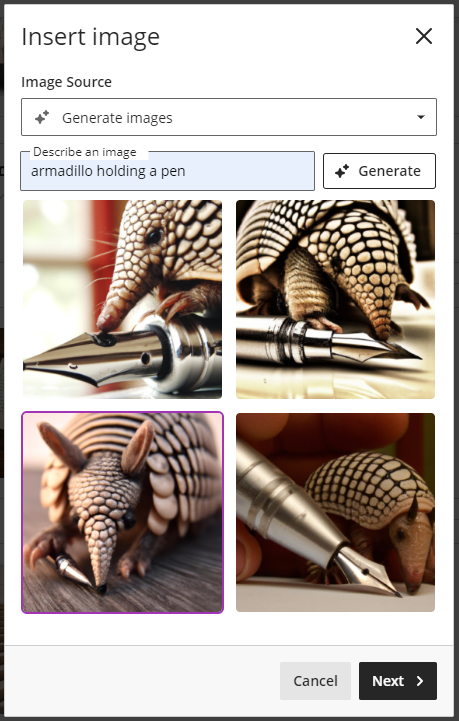
Example of a prompt to generate an AI image using the Design Assistant:
Staff responsibility
The Design Assistant can generate suggested content that is potentially inappropriate for the module’s level or desired learning outcomes.
Staff must review all AI generated content for suitability before including it as module content and ensure that any content with potential issues is either edited after the auto-generation or not used for the module.
Data Privacy for Microsoft AI
The Ultra Design Assistant, Bing Chat and the Windows 11 co-pilot tool are all using Microsoft AI (Azure OpenAI) to answer your prompts.
An important benefit of generating AI images or test questions through the Ultra Design Assistant is data privacy. The data you enter as prompt and the output generated through the design assistant is private to the user who created it and will not be shared with anyone else.
If you are using a free AI generator, your data will commonly be used to train the AI and any input you provided might be included in a response to other users.
Bing Chat for users who log in with a London Met staff account (not available to students)
Copilot available Windows 11 staff machines
Generate AI images
AI images can be generated for a Learning Module thumbnail or added to an Ultra document through the content editor.
To start generating an AI image
Add as Learning Module Thumbnail: click on the ‘Add image’ option in the edit panel of the Learning Module
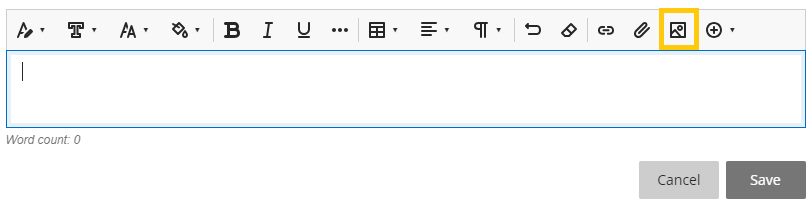
Add through Text Editor: open a Content Editor on an Ultra Document. Click on the image icon on the toolbar.
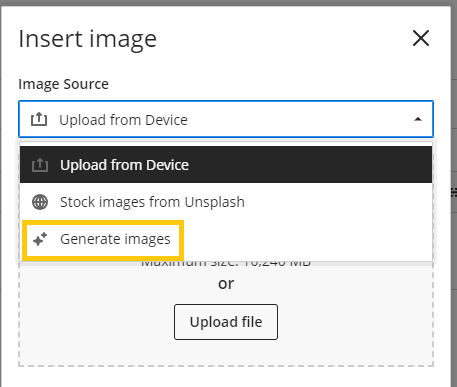
Click on the ‘Image Source’ dropdown and select ‘Generate images’
Enter a prompt in the ‘Describe an image’ box and click on ‘Generate’. If you don’t like the created images, try clicking ‘Generate’ again or change the prompt to get new images.
Click on the image you want to use and then click the ‘Next’ button
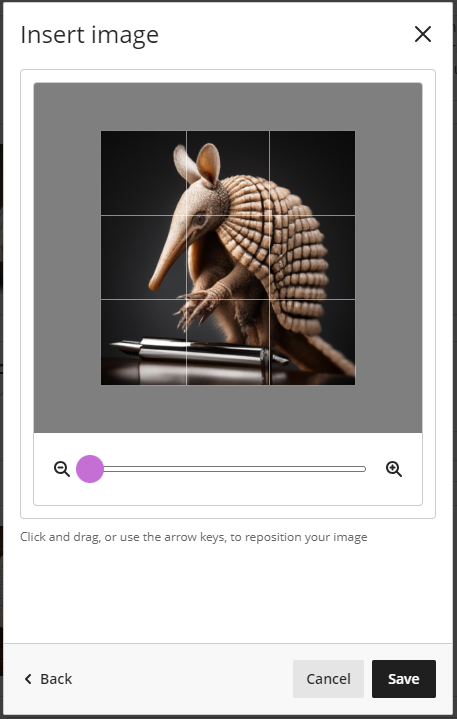
Define the position or image ratio (Ultra document only) as needed and click ‘Save’ to add the image
Generate Test Questions and Question Banks
The Design Assistant allows Instructors to create question for different levels of complexity and specified question types based on prompts or module information provided. Instructors can
auto-generate Test Questions for a Test where questions will be created based on the module’s title and any prompts added by the instructor
auto-generate Question Banks from an Ultra Document where questions will be created based on the content of the Ultra Document
Auto-generate Questions for a Test
Create a new Test or open a Test in edit mode
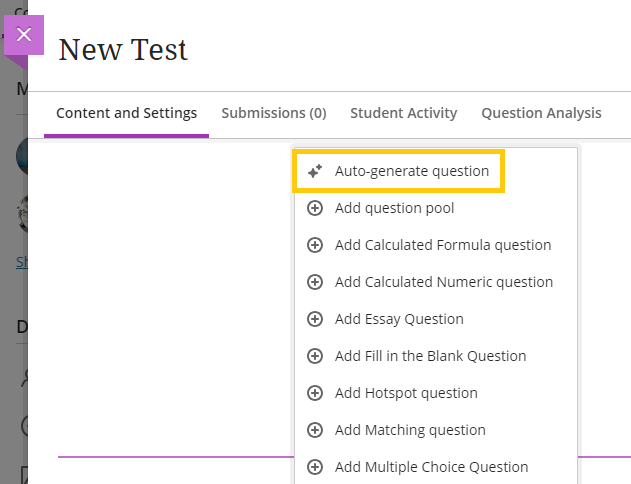
Click on the Plus (+) button to create a new question and select ‘Auto-generate question’
Define the Question
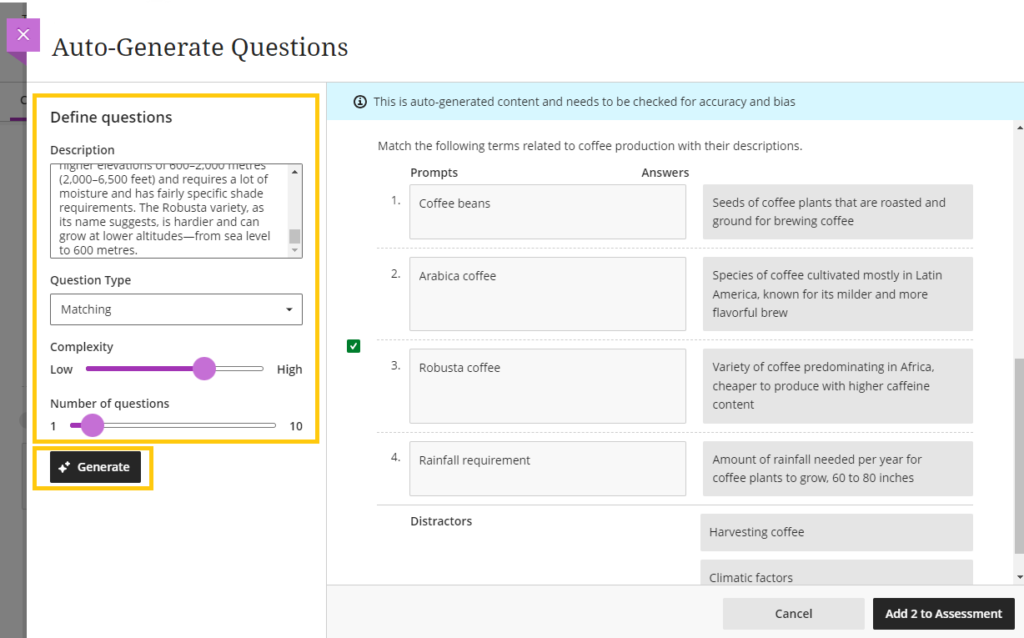
Add text in the ‘Description’ input to provide a prompt for question generation. Note: The pasted text can includes paragraphs or pages of text without images. If too much text is pasted an error messages stating that questions can’t be generated will appear and you’ll need to shorten the text. Testing descriptions with 700 words of text worked successfully.
Select a ‘Question Type’ from the dropdown menu or use ‘Inspire me!’ to get a random selection of question types
Drag the slider under ‘Complexity’ to specify the complexity level of the question
Drag the slider under ‘Number of questions’ to specify the desired number of questions
Click the ‘Generate’ button and wait until the questions are generated
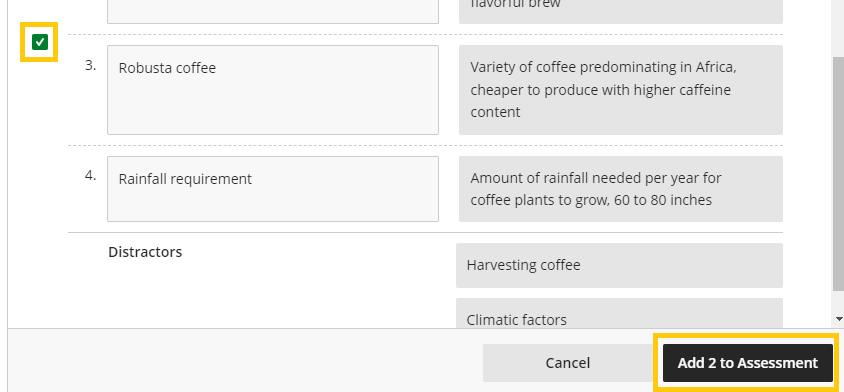
Review the questions and select the ones you want to use (you can edit question if needed once they have been added to the test)
Click ‘Add to Assessment’
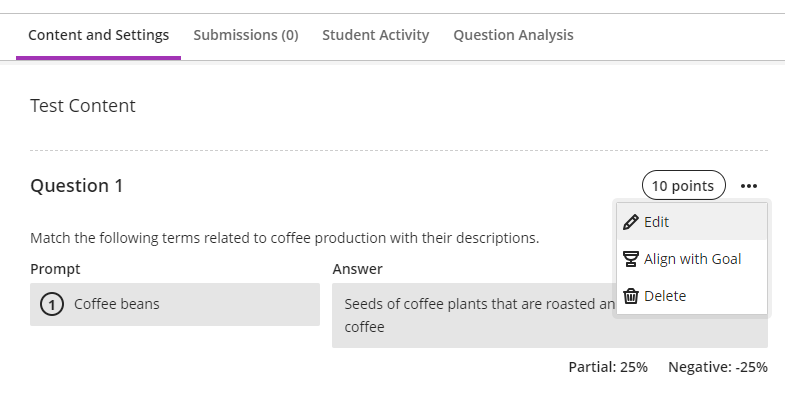
The questions will now appear in the Test and you can edit them as needed.
Auto-generate Question Banks
Once you have created an Ultra Document with content, you can create a Question Bank from the document and then use the questions in test(s) you create on the module. This is particularly useful to create revision and formative quizzes for the module.
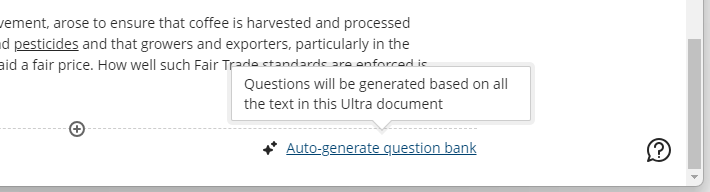
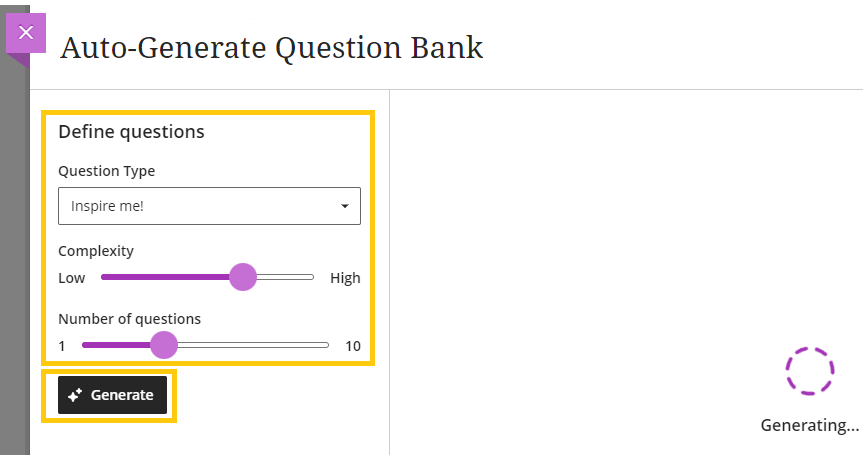
Open a document with content and scroll to the bottom of the page. Click on ‘Auto-generate Question Bank’ link
Define the query by selecting the ‘Question Type’ and specifying the ‘Complexity’ and ‘Number of Questions’
Click on ‘Generate’
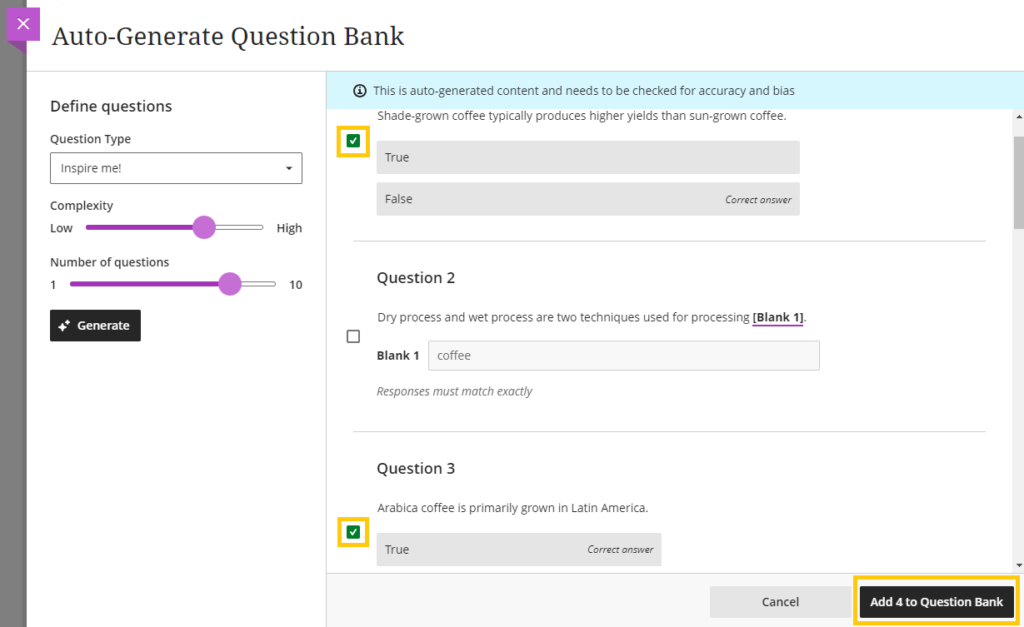
The questions will be generated based on the text available on the Ultra Document.
Review the suggested questions and select the ones you want to add to the question bank
Click ‘Add to Question Bank’ button
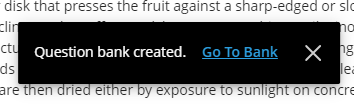
A pop-up with a link to the question bank appears. Click on ‘Go to Bank’ to check all questions. Alternatively you can access the Question Bank later from the ‘Question Bank’ link under ‘More tools’ on the content page of the module.
Edit the title or individual question as needed
You can now add the questions to any test.
Create a new Test or open a Test in edit mode.
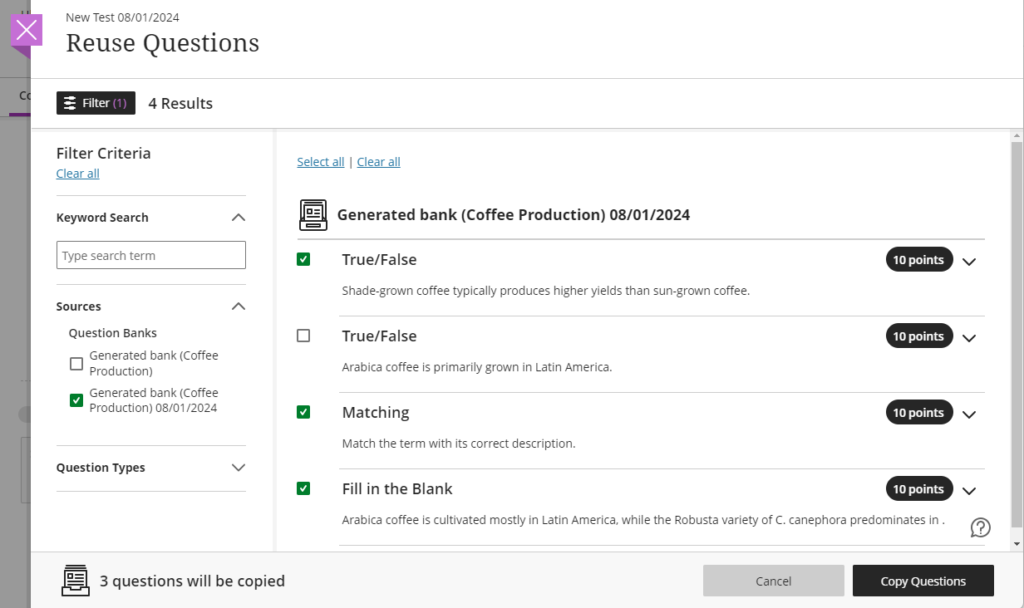
Click on the Plus (+) button and select ‘Reuse Question’
Select the Questions from the Question Bank you want to include in the test and click the ‘Copy Questions’ button
Generate Journal or Discussion prompts
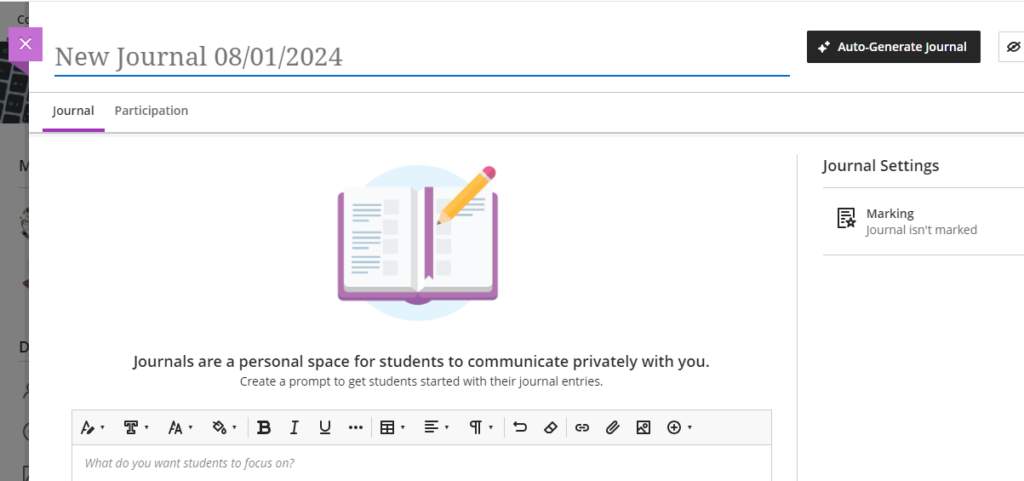
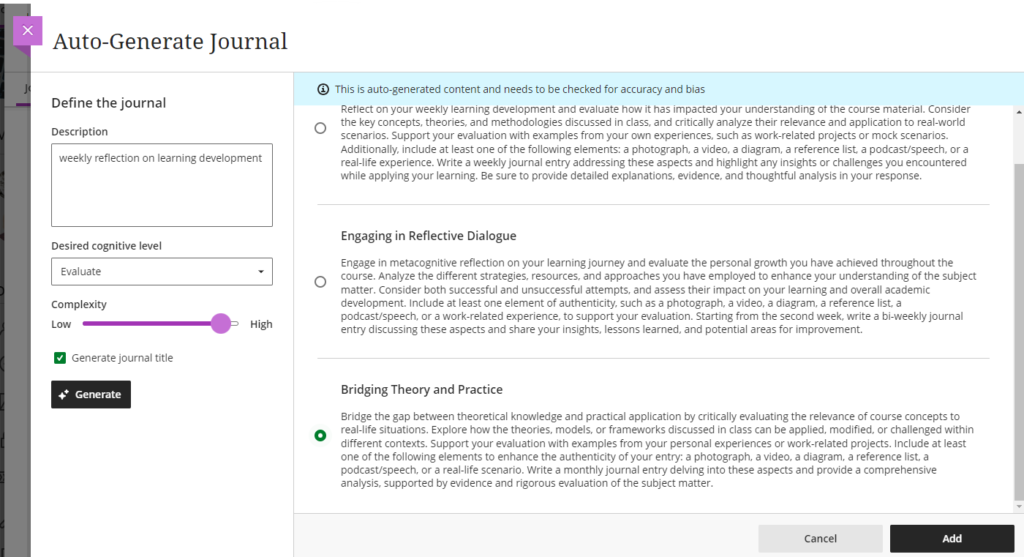
You can use the Design Assistant to create a Journal or Discussion prompt based on a topic description and levels of cognition and complexity.
Open the Journal or Discussion tool and click on the ‘Auto-generate’ button
Add a description for the topic of the Journal or Discussion
Set the cognitive level of the discussion
Select the Complexity of the generated prompts
Click on ‘Generate’ to create suggested prompts
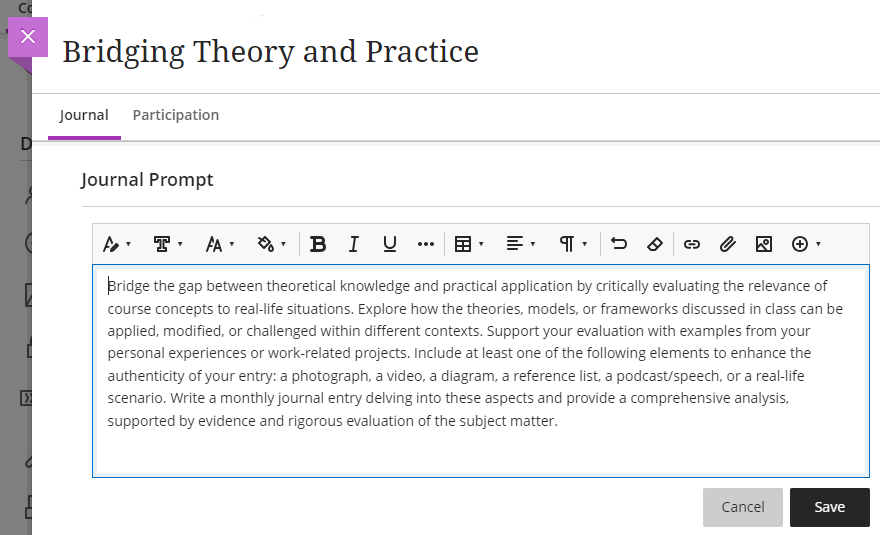
Select the suggested prompt you want to use and click on ‘Add’. You’ll be able to edit the selected prompt once the Journal or discussion has been generated.
If none of the prompts suit your module delivery, try changing the cognitive level and/or complexity and click on ‘Generate’ again or click ‘Cancel’ to stop the auto generation.
Once you click ‘Add’, the Journal or Discussion will be created and you can edit the title or prompt as required.
After a successful pilot of the new version of Blackboard called Ultra for our Course Sites on Weblearn, London Met is now moving to Ultra for Level 3,4 and 7 Weblearn modules for 2023/24.
The Ultra Course View provides a wealth of new features and improved workflows to create a better online experience for staff and students.
Some of the best new or improved features of Ultra include
Progress tracking and Learner Analytics
‘Document’ content type for complex and rich content
Making content interactive with ‘Conversations’
Improved assessment tools and workflows
Working with Ultra requires a different approach to content design and module management compared to the Original Course View.
Support and training will be provided to facilitate a successful transition from Original to Ultra. Ultra modules for Level 3, 4 and 7 will be made available from May onwards to allow for plenty of time to rebuild content over the summer.
Join a focus group to contribute to the development of templates and recommendations for Ultra
Build your Ultra module (Jun – Sep)
Join Ultra sessions including ‘Designing Content’, ‘Teaching with Ultra’ and ‘Ultra Assessments’
Attend workshops for good practice
Start building your Ultra module
What is Ultra?
Blackboard Learn Ultra is a powerful new version of Blackboard that includes Ultra Base Navigation and the Ultra Course View for modules and organisations.
Blackboard Learn Ultra features simplified navigation and data-driven learning analytics, all contained within an intuitive mobile-friendly experience. Created in collaboration with real-life instructors and students, Blackboard Learn Ultra is designed to support teaching workflows, making it easier for instructors to teach and improving student outcomes.
Weblearn switched to using the Ultra Base Navigation in 2021.
The Ultra Course View defines what a module looks like and offers a user experience that features a simple, modern, intuitive, and consistent interface on any device.
The accessible and responsive design ensures that users have a great experience accessing Blackboard Learn on any mobile device they use.
Ultra Highlights
Progress Tracking
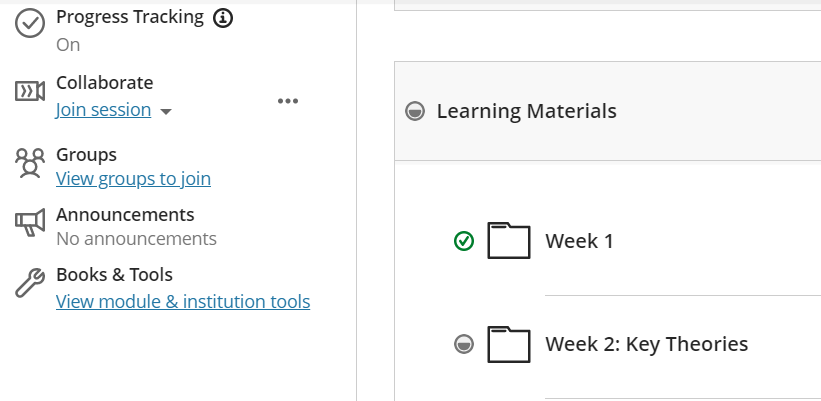
Use a simple toggle button to switch on Progress Tracking for all content.
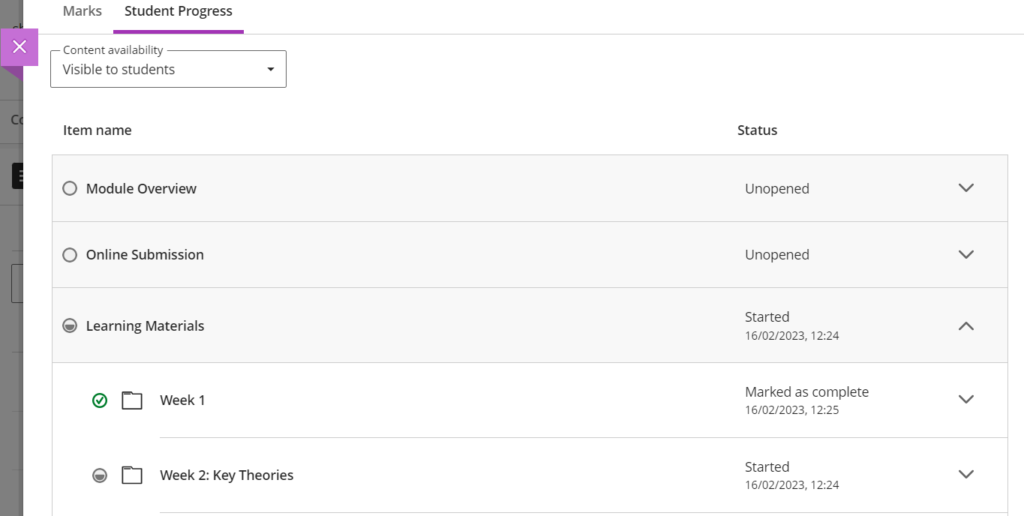
Students can see what content they have accessed and mark items as completed.
Staff can view a student’s progress from the Ultra Gradebook.
Managing Ultra Content
Ultra enables users to easily add content where they want it to appear.
Add content in any location
Simply point to where you want to add content and a plus sign appears to add your content where you want it to appear. No more moving up content from the bottom of the page.
Drag and drop
Move content to different folders or re-order content on a page with drag and drop.
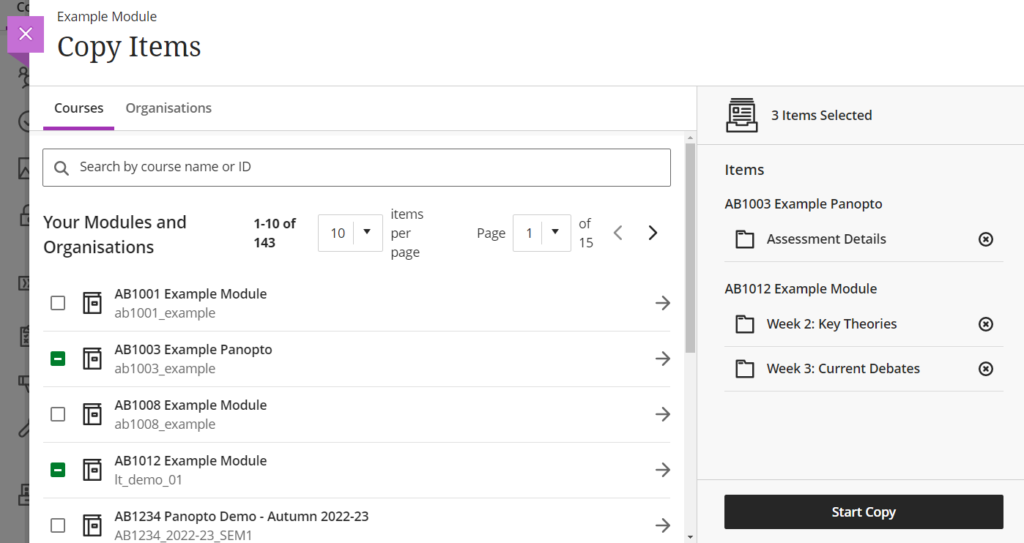
Copy Content from other modules
Ultra puts you in full control of copying content. Copy the exact content you want and add it exactly where you want it.
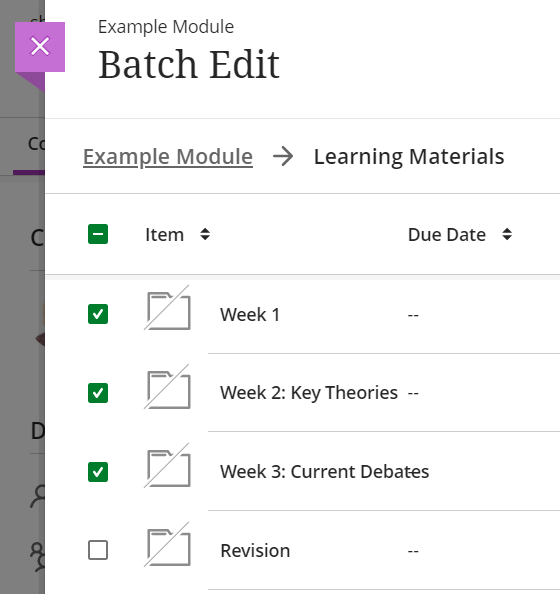
Batch Edit
Edit visibility or delete content in one go using batch edit instead of managing each file individually.
Documents
Easily combine text, images, videos, files and more to present module content to students.
Make your document interactive by adding a ‘Conversation’, a contextual discussion thread that staff and students can access directly from the document.
We’re updating Weblearn to incorporate the new Blackboard Ultra Base Navigation this summer (exact date tbc). This new navigation has a sleek, modern look and feel and will save you time with simpler workflows and easier access to important information.
What is the Ultra Base Navigation?
It is a modern, intuitive navigation menu that lives outside of modules. It includes links to new pages such as the Activity Stream, Calendar, Messages, etc. that provide quick access to the most critical information consolidated from all your modules.
Your modules will not change. They will look and operate exactly as they do now
Once Base Navigation has been enabled you will see the new navigation as soon as you log into Weblearn
The Weblearn start page will be replaced by the ‘Activity Stream’ showing all recent activity on your modules and course sites
Your modules will be available on a ‘Modules’ link in the new navigation menu
How will this enhance your efficiency and experience?
Works well on mobile devices. This navigation is designed to work well regardless of which device you’re using.
Aggregates important information. Allyour module and organisation information – like calendar, messages and grades – is now consolidated into one global view, minimizing the time spent navigating into each individual module.
Only one click away. See something that needs your attention? Just click on it and you will be taken directly there, minimizing clicks and saving time.
Communication. A new messages tool will become available, allowing students check all of their Weblearn messages from a central page. This is a great new tool for users who are less likely to check their university email
Piloting Ultra Module View. Interested staff will be able to pilot Blackboard’s new module interface, the Ultra Module View.
Will I be affected by downtime?
The upgrade will take hours rather than days. It will be scheduled for an evening or weekend slot after the main teaching and marking period for this year is over.
Once you access the upgraded version, the first page you see will be the activity stream and all modules will appear on the ‘Modules’ tab. Your modules will be exactly the same as before, so there is no need to get your head around new functionality or tools immediately.
What will the change look like?
The current Weblearn landing page will be replaced by a menu on the left that allows you to access essential functions in one click.
You’ll find all of your modules and organisations under links on the new menu
When you access a module, it will open as a layer over the new Ultra Base Navigation menu. Everything in the module will be exactly the same as on our current Weblearn version.