Check the guide for recording in new rooms: Panopto Classroom guide
Session recording: Lecture recording with Panopto (in a new classroom)
Create a Lecture Recording
Set up AV (new rooms)
The AV system controls the microphone, speakers, projector and camera in the classroom.
- Log into the podium machine in the classroom
- If the AV system is already on: click ‘Default Routing’ to ensure audio and video are enabled
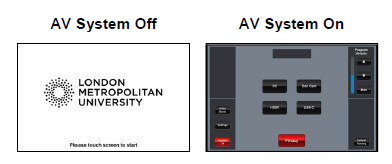
- If the AV system is off, touch the touch panel on the lectern to switch it on
- Take the lapel microphone off the cradle (usually on the side of the lectern) and check that it flashes green
Open Panopto Recorder
You must open Panopto from your Weblearn module to ensure that the recording will be uploaded to the right location.
- Log into Weblearn and go to your module.
- Click on the ‘Panopto Recordings’ link in the module to open Panopto

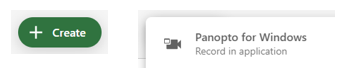
- Click on the Create button and select ‘Panopto for Windows’ to open the desktop recorder
Set up recorder for session

1. Folder and Name of recording
Check the folder name includes the module’s code and semester of your module and add a name for the recording.
Primary Sources
Primary Sources define the camera and microphone used to the recording
2. Select a camera
By default ‘Panopto Presentation’ will be selected, but this will record the screen/monitor instead of the camera and you’ll see the PRESENTATION monitor appear in the video preview.

Make sure you select one of the two option below instead
- Video: select ‘UVC USB3.0 Capture Device’ to record the camera in the classroom
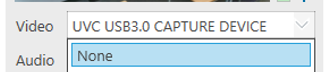
- Video: Or select ‘None’ if you don’t want to record the camera pointed at the podium
3. Select the correct microphone input
By default ‘Digital Audio Interface (Panopto Presentation)’ will be selected. You must change the audio input to ‘Echo Cancelling Speakerphone’ to record audio.
- Audio: select ‘Echo Cancelling Speakerphone (Panopto Audio)’

4. Check microphone is working
- Speak into the lapel microphone and check that the audio bar moves
Secondary Sources
The secondary sources define what content is recorded by Panopto.
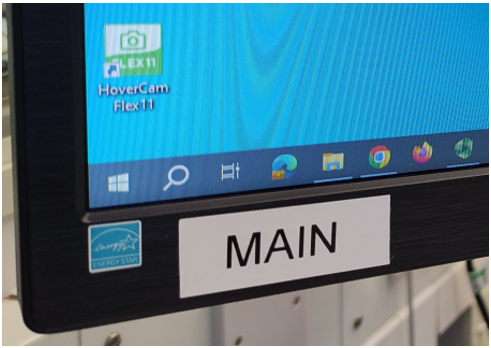
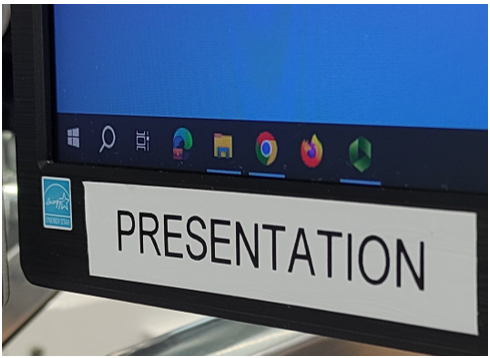
New classrooms have dual monitors (screens), one that is projected into the classroom and one that can be used to open applications without showing them to students. The monitors are labelled MAIN and PRESENTATION
MAIN: not shown to students in the classroom. The main monitor is listed as ‘Main’ screen in Panopto
PRESENTATION: projected into the classroom to share with students. The presentation monitor is listed as ‘Secondary’ screen in Panopto
5. Set up PowerPoint presentation (if used)
- Download the lecture slides from Weblearn and open the application. Start the slide show (F5 on keyboard) to check that the full screen view opens on the ‘SECONDARY’ monitor and the ‘Presenter View’ (Notes) appear on the MAIN monitor. Close the full view again (Esc on keyboard).
- Tick ‘Capture PowerPoint’
- Click on the PowerPoint tab and select ‘Start presenting when recording starts’
6. Select screen (monitor) to be recorded
- Untick ‘Capture Main Screen’ and select ‘Capture Second Screen’ only
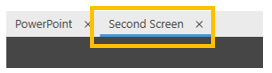
- Click on Second Screen tab in the preview window and tick ‘Enable screen capture preview’.
- Check that the preview window on the recorder shows the same content / screen as the screen in the classroom. If not, select the other available screen.
Recording with Panopto
- Click Record
- The recorder will be minimised into the task bar. Click on the taskbar icon to open it up again when needed.
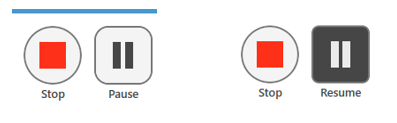
- Click Pause / Resume for short breaks only. Stop the recording for longer breaks and then start a new recording
- Click Stop
- Wait until ‘Currently Uploading Recording’ message disappears
- Close recorder and log out of the teaching machine
More information
Differences between old and new classrooms
Old and newly refurbished room have different different AV systems and controllers. The easiest way to distinguish between the room is to check the lectern and the number of monitors in the room.
New room: White lecterns with two monitors
Old room: Wood coloured or black lectern, usually with only one monitor
Newly refurbished rooms
Newly refurbished rooms have
- white lecterns with a touch screen control
- two monitors
- lapel microphone attached to the side of the lectern
- ceiling cameras to record the front of the classroom

Main monitor
The MAIN monitor is not projected into the classroom. It can be used to open applications or content that does not need to be shared with students for the lecture, eg the Panopto recorder or the edit view of PowerPoint.
Presentation monitor (secondary screen in Panopto)
The PRESENTATION monitor is projected into the classroom and this is the screen that should be recorded. It is called ‘Secondary’ screen in Panopto and users must select ‘Capture Secondary Screen’ to include it in the recording.
Lapel Microphone
The microphone will be attached to the side of the lectern in a cradle. Check both sides of the lectern if you cannot find the microphone.

Take the microphone out of the cradle
When you take the microphone out of the cradle, the LED light will flash in red and then change to green.
- Microphone status
- LED green: you are ready to record.
- LED red: if the LED remains red, the microphone will not record (likely not charged enough)
- Microphone On / Off
- No LED light: the microphone has been switched off. Press the on/off button and hold it down for 3 seconds
- Microphone muted
- LED yellow: the microphone is on mute and you need to slide the mute button to unmute

Change Panopto settings for recording
When Panopto is first opened, it will automatically select settings that must be reviewed / changed for a successful recording.
New room default settings
- Video: Panopto Presentation
- Audio: UVC USB3.0….
- Screen: Capture Main Screen
Change to required setting for Panopto recording
- Video: select ‘UVC USB3.0 Capture Device‘
- Audio: select ‘Echo Cancelling Speakerphone’
- Screen: select ‘Capture secondary screen’ (records presentation screen)
Old rooms
Old rooms usually have
- a wood coloured or black lectern
- a single monitor on the lectern
- a gooseneck or USB microphone on the lectern
- no ceiling camera
Microphone
If the old room has a black microphone on the lectern, select
Audio: ‘Microphone (USB with Codec)’
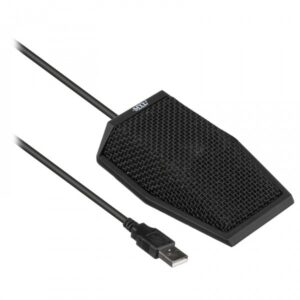
Check that the audio bar is moving before you start recording to ensure audio will be included in the recording.
More info on microphones in old classrooms
Camera
If the doc cam in the room is switched on, Panopto will automatically select the doc cam as a default video input.
Change the Video selection to ‘None’ if you do not want to use the doc cam.
If you want to use the doc cam, check what is recorded in the video viewer of the Panopto recorder and adjust the doc cam as required.
Video: HoverCam Solo 8
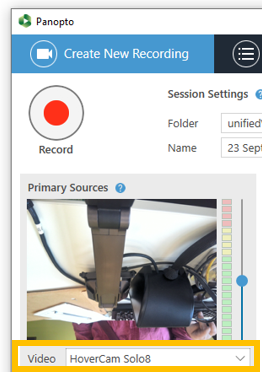
Recording screen
Most old rooms only have one monitor.
Check that ‘Capture Main screen’ is selected.
If an old room has two monitors, use the screen preview window to check which monitor is projected into the classroom and select that screen for the recording.
Naming convention for Lecture recordings
Decide on how to name your recording to ensure that students can easily identify them in the Panopto folder.
If you are using multiple recordings, clearly label them as part 1, part 2, etc of the same lecture.
Recommended naming convention:
Module code + Week + part
e.g. AB1001 Week 2 – Part 1
Step by Step
Open Panopto application from Weblearn
Panopto must be accessed from the Weblearn module where it will be published to ensure that the recording will be saved in the right location.
Close down any browser windows and applications you will not be using during your lecture, e.g. an open Sharepoint folder or your staff mail.
- Go to your Weblearn module
- Click on the ‘Panopto Folder’ link in the module menu
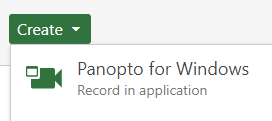
- Click on the ‘Create’ button on the Panopto folder screen
- Select ‘Panopto for Windows’ to open the Panopto application
- On the next screen, click ‘Open Panopto’ and wait until the Panopto recorder opens (this can take 10-20 seconds)
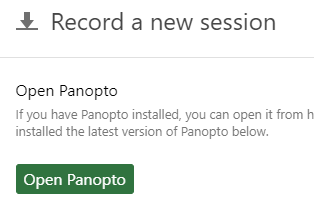
The Panopto recorder opens.

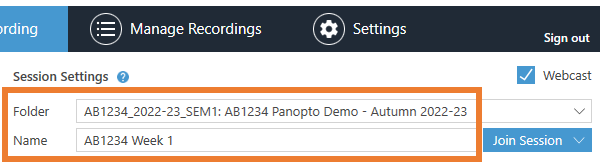
Check recording name and folder
The name of Panopto folder is created using the Module ID and Module Name as they appear in Weblearn, e.g.
“AB1234_2022-23_SEM1: AB1234 Module Title – Autumn 2022-23“
- Check that the correct Panopto Folder has been pre-selected to store the recording. The correct folder name will include the module ID and the module name.
- Edit recording name (this can also be done at the end of the recording)
Video (camera)
Cameras will only be available in newly refurbished rooms. They are ceiling mounted cameras with pre-set option to capture the podium or the front of the classroom. The cameras can also track a lecturer as they move around.
The use of cameras is optional. If a camera is used, you must tell your students that the session will be filmed.
If students voice concerns about a camera in the classroom, you can
- set the camera to only capture the podium and switch off auto tracking
- set the camera to only capture the very front of the classroom and ask students who do not want to be recorded to relocate to areas of the room that will not appear on camera.
These options might not be suitable for some students, e.g student with visual impairments or anxiety disorders. If there is no suitable option, the classroom should not be captured on camera.
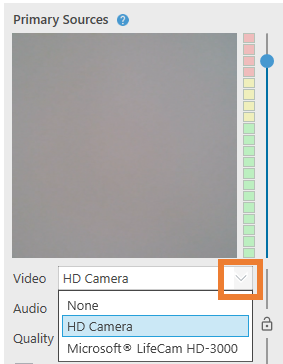
To change the selected camera
- Click on the dropdown arrow for the ‘Video’ field under Primary Sources
- Select a different camera if shown, or select ‘none’ to switch that camera feed off for the recording
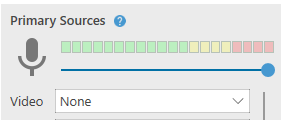
If ‘none’ is selected, the camera preview window will disappear and the audio bar will appear horizontally above the video input.
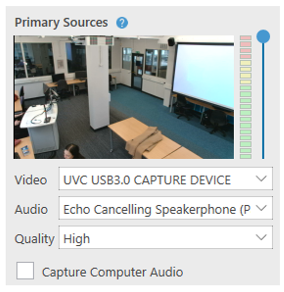
Select Camera in new room
Video: select ‘UVC USB3.0 CAPTURE DEVICE’
If you select Panopto presentation, the video will record the presentation screen which will then show up twice in your lecture recording.
If no camera is currently available in the room, the Primary Source panel will appear as below.
If you want to use the doc cam in a room, switch on the doc cam and it should become available for selection.
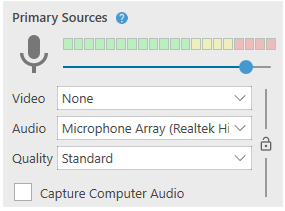
Audio (microphone and computer audio)
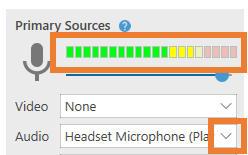
- Check that a microphone has been selected in the audio dropdown
- Check that the audio bar is moving when speaking. If not, select a different microphone and test again
- If you are planning to play a video with audio in the classroom, tick ‘Capture Computer Audio’ so the audio will be included in the webcast and recording.
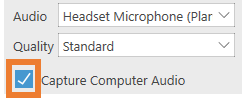
Note: computer audio recorded during the lecture will likely be out of synch with the video. A link to the video should be shared on Weblearn, e.g. in the lecture slides or as a link in the weekly folder.
Screen capture (Single monitor on lectern)
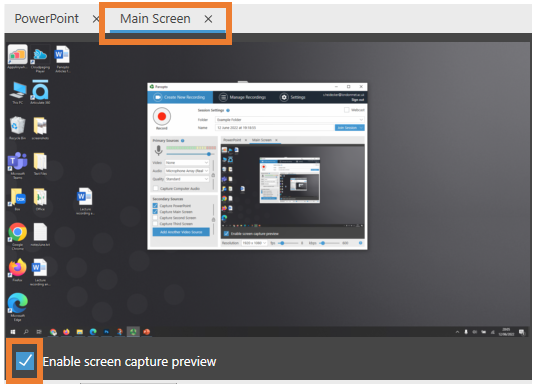
If the classroom has only one monitor, the ‘Main Screen’ will be auto-selected. Check the screen preview to verify what will be recorded on the screen.
- Select the Main Screen tab in the screen viewer
- Tick ‘Enable screen capture preview’
Capture Screen (Two monitors on lectern)
If the classroom has two monitors, you need to ensure that the correct screen is corrected.
By default, Panopto will be set to ‘Capture Main Screen’.
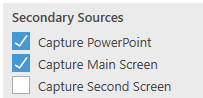
Old classrooms with two screens
A small number of old classrooms have two monitors on the lectern. If you are teaching in one of those, check the screen preview to verify what will be recorded. If the ‘Main Screen’ does not record the same screen as the one projected into the classroom, switch the selection.
New classrooms
All new classrooms have dual monitors (screens) that are labelled MAIN and SECONDARY. Select the SECONDARY screen for the Panopto recording.
MAIN: not shown to students in the classroom
SECONDARY: shown on the projector or monitor in the classroom
Switch to capture the second screen
- Untick ‘Capture Main Screen’
- Tick ‘Capture Second Screen’
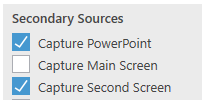
- Click on the screen tab in the preview and tick ‘Enable screen capture preview’.
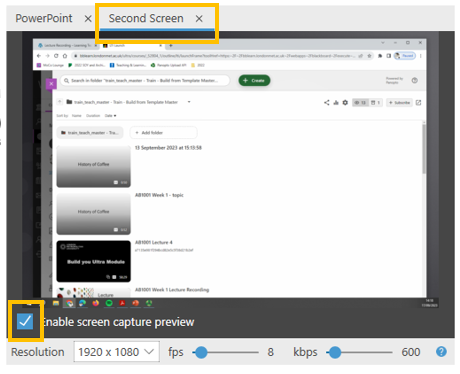
The screen recorded by Panopto should show the same content as the screen displayed in the classroom.
If the Second Screen preview does not show the same content as the screen students see in the classroom, select the ‘Capture main screen’ instead.
PowerPoint
If you are not using PowerPoint slides for your lecture, untick the pre-selected ‘Capture PowerPoint’ option.
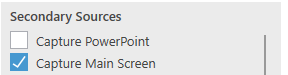
If you are using PowerPoint slides
- Open your slides on the desktop (you can just download them from Weblearn)
- Click on the PowerPoint tab in the screen viewer
- Tick ‘Start presenting when the recording starts’ to automatically open the PowerPoint in full screen mode as soon as you start recording.
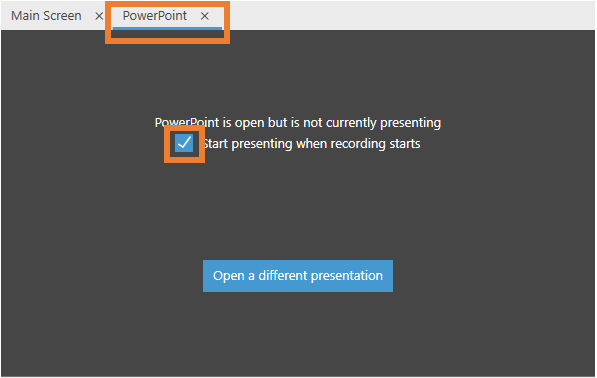
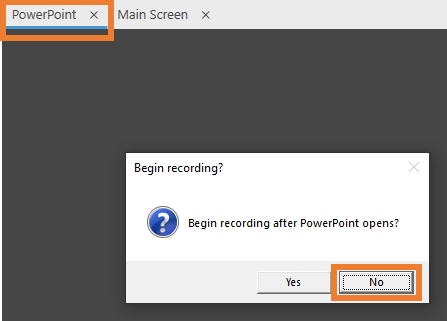
If you do not select ‘Start presenting when the recording starts’ you will get a dialogue asking to specify when recording should start:
- Select ‘Yes’ for Begin Recording after PowerPoint opens if you only want the recording to start after you open the PPT in full view
- Select ‘No’ if you want the recording to start as soon as you click the record button. This will record any activity on the screen before you open the PPT in full view
PowerPoint and dual monitors
If you are in a room with dual monitors, it is worth checking which screen your PowerPoint opens on.
- Open your PowerPoint
- Press F5 to open the PowerPoint in full screen
- Check the PowerPoint is projected on the screen in the classroom
- Press Esc to exit the full view
If the PowerPoint opens on the screen that will be recorded you are good to go.
If the PowerPoint opens on the other screen, you need to switch the monitors.
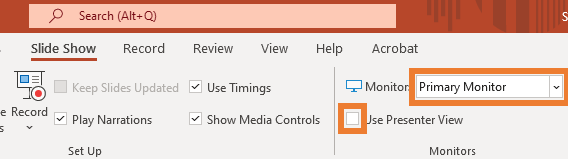
- Click on the ‘Slide Show’ tab of your PowerPoint
- Click on the monitor input
- Select the monitor not currently selected
- Your PowerPoint might open in full screen mode on both monitors (Presenter View). Untick the ‘Use Presenter View’ tickbox if you don’t want to use Presenter View.
Start and Pause Recording
- Start recording
Click on the record button or press the F8 key

If you have set a PowerPoint to open once recording starts, the PowerPoint will now open in full screen view.
The Panopto recorder will be minimised.
- During the recording
Click on the Panopto icon in the tool bar to bring up the Panopto recorder if you need to pause or stop the recording

- Pause a recording
Only use Pause for short breaks. If you have a longer break (15+ min) it is better to stop the first recording and create a second recording for the second part of the lecture.
If you pause a recording, Panopto will continue recording in the background but the section where you paused the recording will not be included in the video that students will see.
- Click Pause / Resume to stop and start the pause
Stop recording and check upload
Click the ‘Stop’ button

Click on the ‘Done’ in the ‘Webcast complete’ dialogue.

Panopto will now show a ‘Currently Uploading Recording’ message. Do not close your computer whilst this message is still on the screen.

Once the message changes and your recording appears under ‘Uploaded Recordings’, you can log out.

You can also delete the local files at this point if you want.
The files would be accessible to all users on a teaching computer, but they are not human readable.
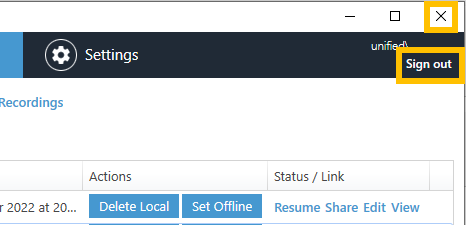
Sign out from Panopto and close the Panopto application