
Groups can be used to make content available to specific users or to distribute online submissions to multiple markers.
Group Sets and Groups
Each group on Weblearn is part of a group set. The group set controls who can be added to a group and prevents students from being added to multiple groups within the same group set.
Students can be part of multiple groups as long as the groups belong to different group sets.
Weblearn provides 3 types of group sets as well as the ability to create a new group based on an existing group.
- manual assignment
- automatic assignment
- self‑enrolment
- import with a CSV file
| Group Set type | Use to |
| Manual assignment | Create one or more groups and manually assign users |
| Automatic assignment | Students will be randomly assigned to the created groups |
| Self-enrolment | Allow student to sign up for group work or activities Can be used for Group submissions (Weblearn assignments) |
| Import with a CSV file | Import group membership based on timetable data |
Create Groups
Manual Assignment
Manual assignment groups allow you to select students and add them tot he required group.
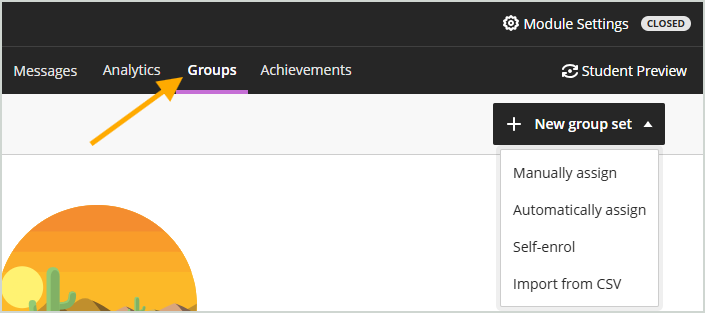
- One the Groups tab, click on the ‘New group set’ button and the select ‘Manually assign’
- Enter a name for the group set and the click on the plus (+) button to create the first group
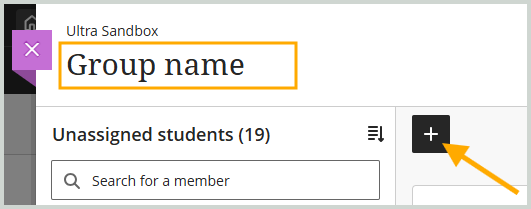
- Enter an appropriate name for the group
Optionally, select the ‘Add members’ button and add students to the group
- Click on the ‘Done’ button

Repeat these steps until you have created all the required groups.
To add the students to the groups, simply select the students names from the ‘Unassigned students’ panel and then click on the ‘Assign here’ button for the group you would like to add the students to.
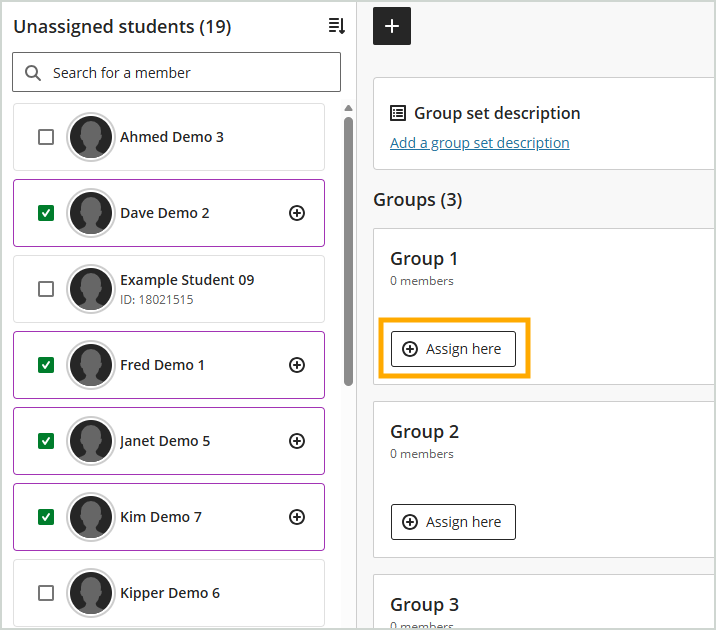
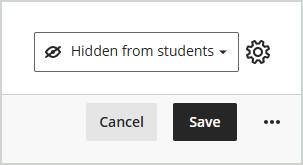
Once you have added all students to the groups, click on the ‘Save’ button at the top right of the screen.
Automatic assignment
- One the Groups tab, click on the ‘New group set’ button and then select ‘Automatic assignment’
- Enter the number of students you would like added to each group and then select ‘Enrol members’
Weblearn will automatically create the groups based on the number of students on the module and number of students to be added to each group.
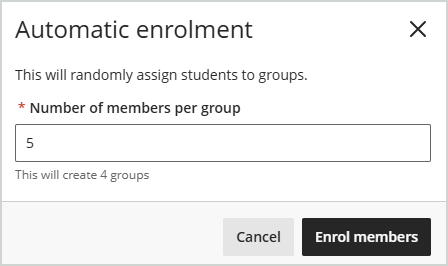
If there are any Student Preview users on the module they will also be automatically added to one of the groups.
- Once all students have been assigned to a group, click on the ‘Save’ button at the top right of the screen.
Self-enrolment
Self-enrolment groups allow students to self add themselves to groups.
- One the Groups tab, click on the ‘New group set’ button and then select ‘Self-enrol’
- Set the ‘Self-enrol’ settings for the groups as required.
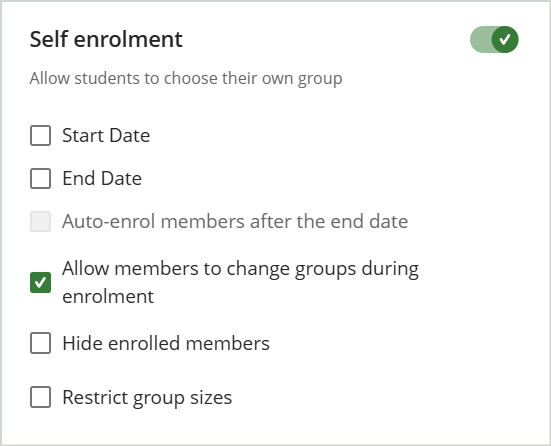
| Setting | Details |
|---|---|
| Start Date | Students can self-enrol after the date set has past |
| End Date | Students can not self-enrol after the date set has past |
| Auto-enrol members after the end date | All students who have not self-enrolled by the end date will be automatically added to one of the groups |
| Allow members to change groups during enrolment | Students are able to remove themselves from a group and join another group until the ‘End Date’ (if used) |
| Hide enrolled members | Students cannot see the names other students who have added themselves to each group |
| Restrict group sizes | Specify how many students can join each group |
By default, 3 groups will be automatically created.
- To add additional groups, click on the plus (+) button to create additional groups as required.

Managing Group Membership
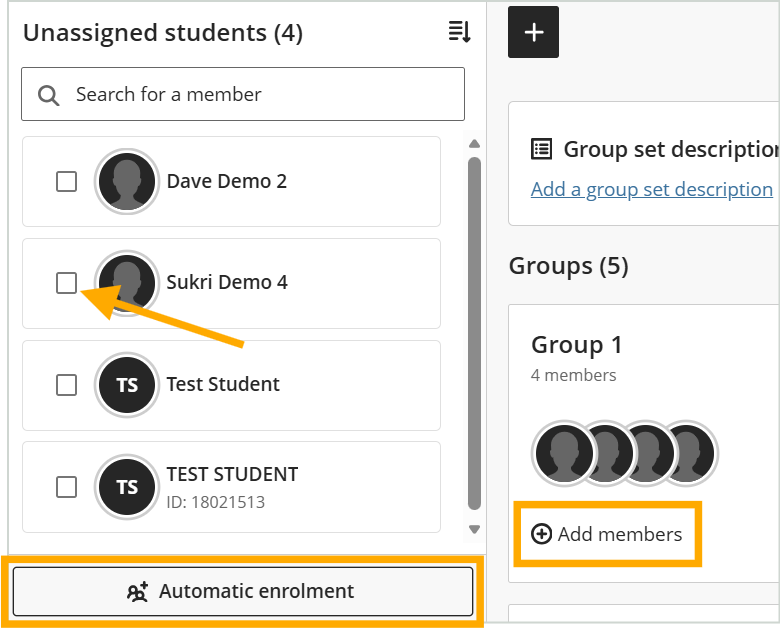
Students can be added to groups by selecting the students from the ‘Unassigned members’ panel, by selecting the ‘Add members’ option, or by using the ‘Automatic enrolment. option.
To view the students who have been added to a group, click on the ‘Expand details’ option
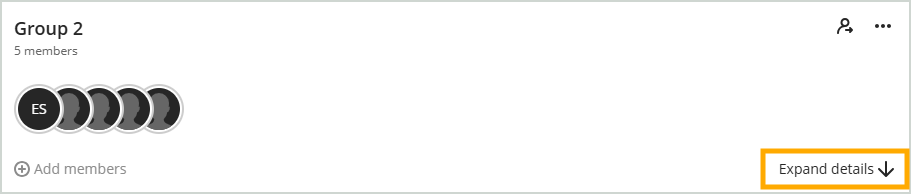
To remove all students from the the group, click on the remove members icon.
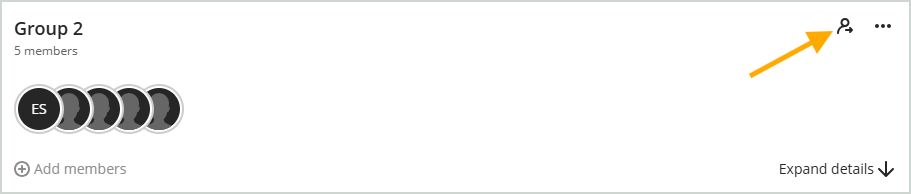
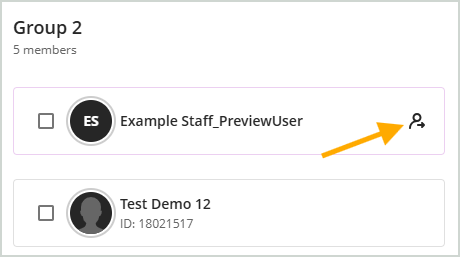
To remove specific students from the group, or a student preview user, click on the ‘Expand details’ option and then click on the remove members icon for that user.
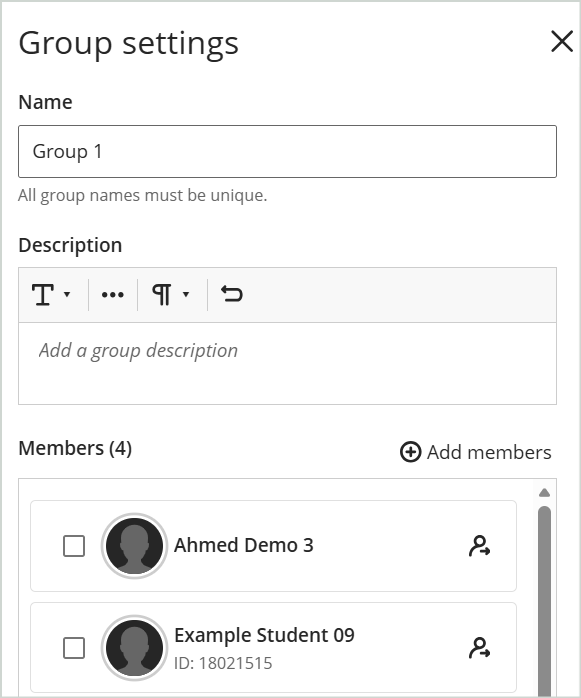
Group Settings
The Group settings is where you can:
- Update the group name
- Add a group description
- Add or remove group members
To access the settings, click on the three dots for the group and select ‘Group settings’
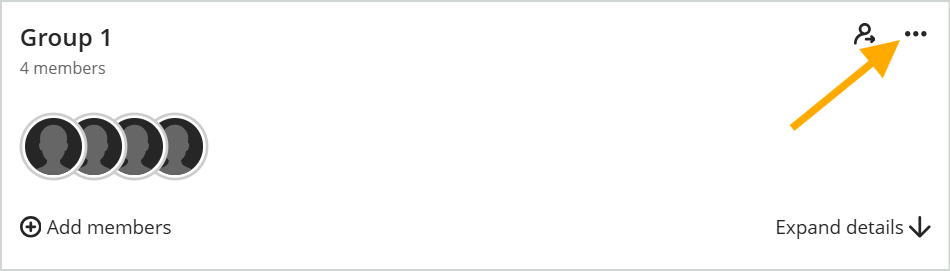
You can now update the settings as required.
Import with a CSV file (advanced)
If you have a large student cohort, it is recommended that groups are created by using the import option. Students can then be assigned to the groups in bulk.
- Manual assignment groups allow you to select students and add them tot he required group.
- One the Groups tab, click on the ‘New group set’ button and the select ‘Import form CSV’
- Download the group creation template file by clicking on ‘Download Group Sets template‘

- Open the downloaded file and enter the values based on the table below
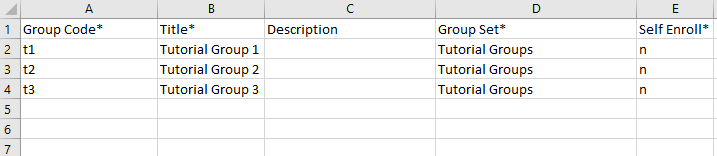
| Field | Value | Required |
| Group Code | The group code should be an abbreviated version of the group title and it must not contain special characters | Yes |
| Group Title | Enter the name for the group | Yes |
| Description | If required, enter the group description | No |
| Group Set | Enter the type of group that is being created eg Marking Group, Tutorial Group | Yes |
| Self Enroll | n | Yes |
- Save the changes you have made to the file
- In the Weblearn module, select ‘Upload file‘
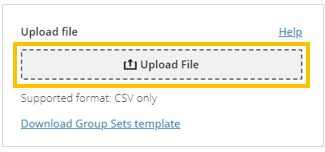
- Locate and select the file on your computer
- Once the file has attached, select ‘Import‘
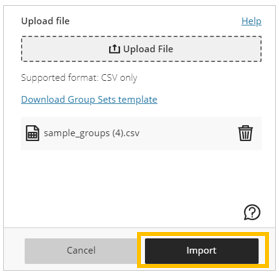
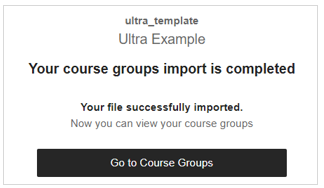
Once the groups have been imported and are ready to be populated with students you will receive a confirmation email
Import students
- To import students into groups, open the group set created
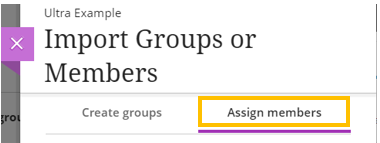
- Select the ‘More options‘ (three dots) icon, then select ‘Import groups or members‘

- Select the ‘Assign members‘ tab
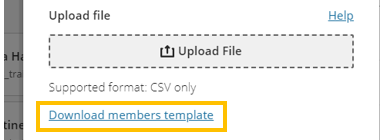
- Download the import students template file by selecting ‘Download members template‘
- Locate and open the downloaded file
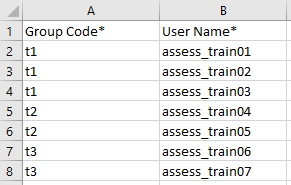
On the Group members file, only the Group Code and the student User Name is required.
- Delete the columns which are not required and then enter the student usernames next to the group code for the group that they should be added to.
- Save the changes you have made to the file
- In the Weblearn module, select ‘Upload file‘
- Locate and select the file on your computer
- Once the file has attached, select ‘Import‘
Once the students have been imported into their group you will receive a confirmation email.