
All London Met modules that are set up on SITS/e:Vision as running in 2026/27 will be automatically created on Weblearn.
The number of Weekly Learning Modules included in the template will be reduced to simplify copying existing content from previous module instances.
- 1 example Learning Module only for modules with previous instances.
- 12-24 Weekly Learning modules for module that have not run previously.
If you are not copying the weekly learning modules from the previous version of the module you can import the learning modules using the files below.
Modules will be made available to students on Weblearn one week before the start of teaching.
| Module Period | Available Date |
|---|---|
| Autumn and Year long modules | Mon 21 September 2026 |
| Spring and Jan start modules | Mon 25 January 2027 |
| Summer modules | Mon 05 April 2027 |
Module Staff
Add yourself to the module
Use the Staff Enrol tool to add yourself to the 2026/27 modules you require access to.
If you are a new module leader, you will be able to use the staff enrol tool to add yourself to the 2025/26 modules if required.
Set the module leader as the Primary Instructor
View the instructional video: Module Staff List: Set Primary Instructor
The ‘Primary Instructor’ will be displayed first in the ‘Module Staff’ list so that students know who to message if they have a problem.
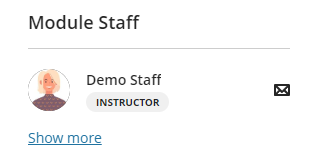
To set the module leader as the Primary Instructor:
- Open the Users page from under the ‘Details & Actions’ menu
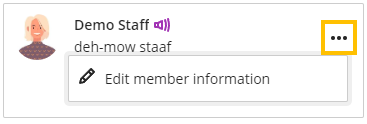
- Select the three dots to open ‘More options’ > ‘Edit member information’
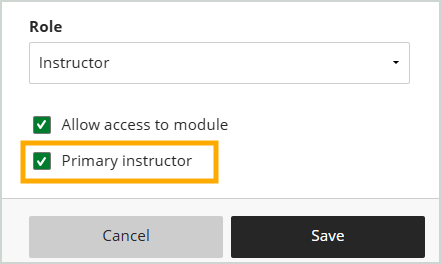
- On the Member Information panel select the ‘Primary Instructor’ check box and then click on the ‘Save’ button.
The user will now be displayed prioritised in the list of staff displayed to students.
Copy Content from Previous Version
If the module ran in the previous academic year, content can be copied into the 2026/27 version.
View the Copy Module Content guide
Key rule:
✅ Copy individual items or Weekly Learning Modules only
❌ Do not copy the entire module (leads to clutter and clean-up work)
❌ Do not copy full Start Here / Assessment / Key resource
| Content | Copy | Update activity |
|---|---|---|
| Start here | ❌ No | |
| Module overview | ✅ Yes | Adjust content to meet the template requirements where appropriate |
| Meet the team | ✅ Yes | Adjust content to meet the template requirements where appropriate |
| Schedule | ❌ No | Update table with dates for the current academic year |
| Assessment | ❌ No | |
| Assessment overview | ✅ Yes | Update the due dates for each assessment component |
| Assessment folder(s) | ❌ No | Update the name of the assessment component folder(s) |
| Assessment brief | ✅ Yes | Update the due dates and assessment information where appropriate |
| Submission links | ❌ No | |
| Assessment video | ❌ No | Copy the video into the current modules Panopto folder and then add a new video link. |
| Key Resources | ❌ No | |
| Additional content added | ✅ Yes | Update the content as required |
| Weekly Learning Modules | ✅ Yes | Update the content as required |
Update the Module Content
Module content must be updated to ensure:
- Current module template is being used as described in the Module Template Guidance document
- All dates are updated and correct for the current academic year
- Content does not include any student contributions from the previous module cohort (e.g. Padlet)
- If used, lecture recording links/embeds have been removed
- All weblinks are still working (e.g. do not point to a ‘page not found’ message)
- Content is logically organised, clearly named, and easy for -students to navigate
Module structure and template
Module content must be added to the correct section on the template. It must be logically grouped and named to ensure consistency and ease of use for students.
To ensure the module is complying with the module template you need to check:
- Each page in the module template has been populated as described in the Module Template Guidance document
- All content headers and links are named clearly
- Additional files are grouped in folders (e.g. a folder for Seminar files)
- Ensure content is logically organised, clearly named, and easy for the student to navigate.
Learning Modules and Folders
Check and update content added to Learning Modules or Folders
- Content on Weblearn documents and Files is correct and does not contain dates or information relevant to the previous cohort only.
- Weblinks are working correctly.
- Panopto links to last year’s recording are removed or replaced with links to recording in the current module’s Panopto folder.
- Delete and links to Padlet, Mentimeter or other interactive tool that include student data from last year. Create a fresh copy of the resource for the current cohort and create a new link.
Weblearn Documents (e.g. What’s on in Week X)
All content added to Weblearn documents must be checked to ensure it is aligned tot he current module template, it has been updated for the new student cohort and there is no broken content.
| Content | Activity |
|---|---|
| Text | Update the text where required and ensure it is aligned to the current module template |
| Weblinks | Check all weblinks are still working |
| Reading list links | Click on any reading list links to check they are pointing to the required list/section |
| Lecture recordings | Delete any embedded lecture recordings which have been copied from last year’s module |
| Embedded content (e.g. YouTube videos) | Check any embedded content is still working Delete any embedded content which includes student contributions from the previous student cohort (e.g. Padlet) |
| Files (e.g. lecture slides) | Check the lecture slides to ensure dates added are correct. Delete and reupload files as required |
Edit and / or replace Files
Note: for quick access to files that need to be edited, click on the 3 dots of a file and select ‘download original file’.
Files that were added to a Weblearn document do not have a ‘replace’ option, you need to delete the existing link and upload a new file.
To replace a file directly added to a Learning Module or folder:
- Click on three dots of the file and select ‘Edit’
- Click on the ‘Replace’ button

Your computer file explorer will open
- Locate and select the new file you want to upload
Once the new file has finished uploading, you can edit the file options and description as required.
- Click on ‘Save’ to confirm your changes
Meet the Team
Edit the Meet the Team document so that the details of the teaching team are available to students.
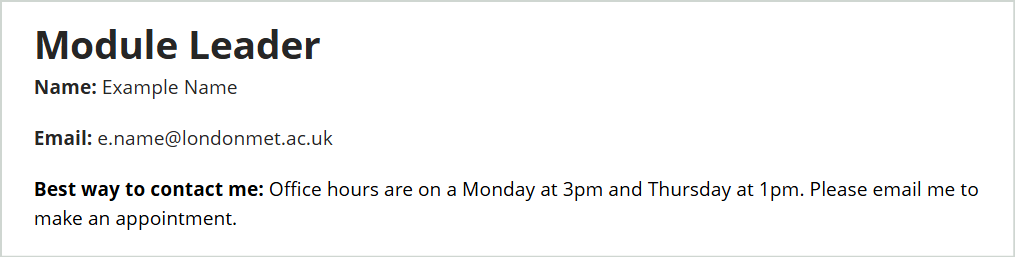
To replace the image placeholder:
- Hover your mouse pointer over the placeholder image and then click on the image icon
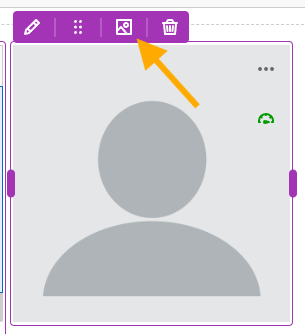
- Click on the ‘Upload file’ button and then locate and upload your image
- You will see a preview of your image, click on ‘Next’
- Click on the ‘Aspect Ratio’ drop down menu and then select ‘Square’
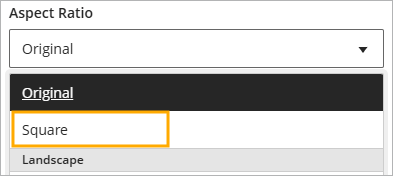
- Adjust the image position if required and then click on ‘Next’
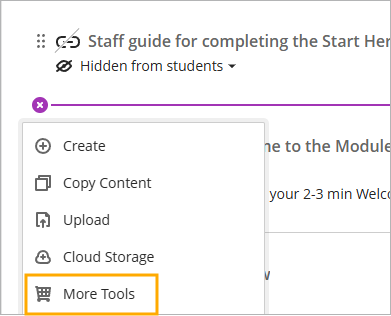
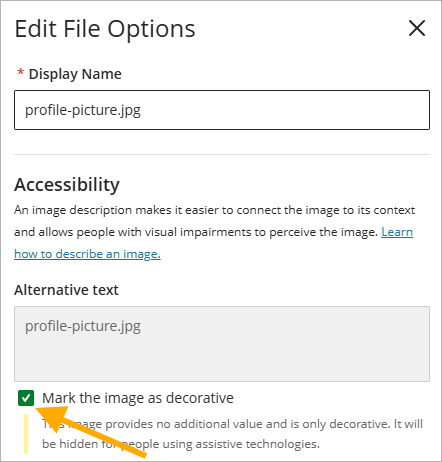
- On the ‘Edit File Options’, click on the ‘Mark the image as decorative’ checkbox and then click on ‘Save’
Module Schedule
The Module Schedule document must include a table to display which topic will be covered in each teaching week.
To update the module schedule you will need to download one of the teaching week date files which contains the correct teaching week dates for 2026/27. Once you have updated the template file you can copy the table onto the Module Schedule document in Weblearn.
Download the teaching week template files:
To update the table inside Weblearn:
- Select the whole table in the word document and then either hold down the Ctrl key on the keyboard and click on the ‘C’ key, or click on the ‘Copy’ icon in the toolbar

- Go to Weblearn and open the Module Schedule document
- Click on ‘Edit content’ and then delete the empty table from the page
- Click on the Plus sign (+) and select the ‘Content’ block
- Right click into the content editor and select ‘Paste’

- Click the mouse pointer into the header row of the pasted table and select ‘Header Row’

- Once you have finished editing the table, click on ‘Save’
Assessment
According to 2025/26 student activity data, 72% of students accessed the Assessment folder at least once before the start of teaching week 6. This highlights the importance of making assessment information available and up to date as early as possible, so that students can understand expectations and begin planning in advance.
| Content | Activity |
|---|---|
| Assessment Overview | Add the assessment information for all components to provided table If copied from last year, update the due dates for all summative assessments |
| Assessment Component folder | Update the name of the assessment component folder(s) by replacing ‘[Assessment name as it appears on e:Vision]’ with the name of the assessment |
| Assessment Brief | Add the assessment information as required by the module template guidance document If copied from last year, update the due dates and assessment information where appropriate |
| Assessment video | Create an assessment video and then add a Panopto Video link to the assessment folder. If a suitable video from the previous module already exists you can copy the video into this years Panopto folder and then add a Panopto Video link |
Add a Welcome Video
Creating a short welcome video is an effective way to set the tone of the module and communicate clear expectations around engagement, assessment, and communication in a friendly and approachable way. It helps students to orientate themselves within the module, understand how it is structured, and quickly identify where to find essential information.
The video should be added to the top of the module for the start of year and removed once teaching has started.
If you have a suitable Welcome video from the previous version of the module you can Copy the welcome video into this years Panopto folder.
To add the Panopto Video link:
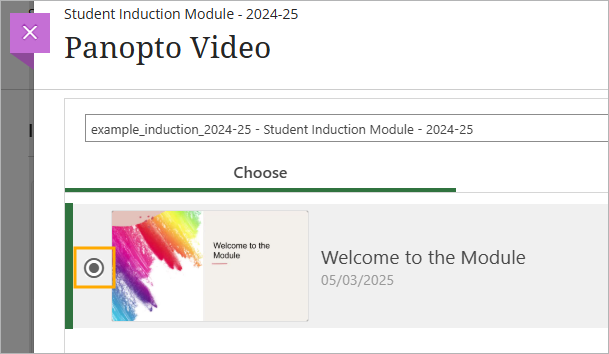
- Click on the Plus (+) icon and select ‘More Tools’
- Click on the ‘Panopto Video’ tile

- Select the welcome video by clicking on the radio button next to the video thumbnail
- Click on ‘Insert’
The video link will now appear at the top of the module
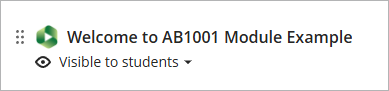
Check the content visibility to students
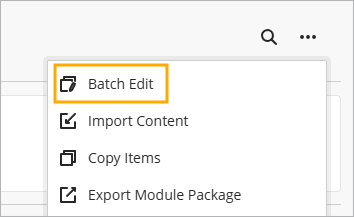
The batch edit option allows you to view and edit the visibility of content in bulk.
At the top of the module content page click on the three dots to open ‘More Options’ > ‘Batch Edit’
The Visibility column shows the current visibility status of the content item.
Click on the item title to view the contents.
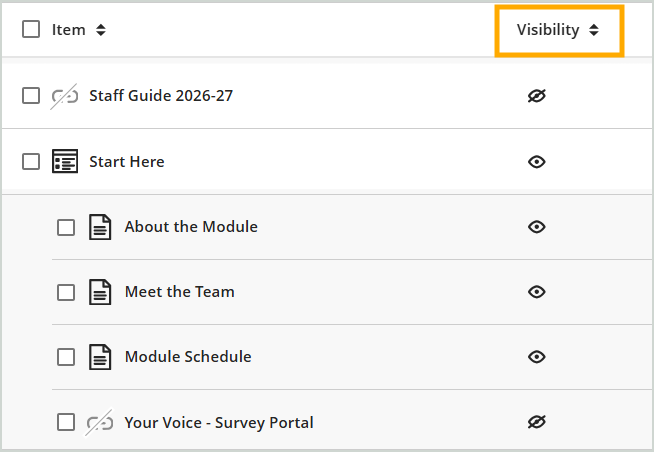
To change the visibility status, select the item and then click on the ‘Edit visibility’ button at the bottom of the screen.
Check content accessibility
The overall accessibility score of a module should be 75% or over. If the module has a low accessibility score you can prioritise what to fix first.
Find out more about accessibility issues and how to fix them: Weblearn Accessibility Checker
To access the accessibility report for a module, click on the ‘More Tools’ option under the Details & Actions menu

Then select ‘Accessibility Report’

View Content in Student Preview
The ‘Student Preview’ allows instructors to view and interact with the module in exactly the same way as a student. In Student Preview you are able to review content and test using Weblearn tools or workflows. The only thing you can’t do in student preview is submit Turnitin assignments.
Enter the student preview by clicking on the ‘Student Preview’ option at the top of each module.
