
The seminar or tutor group information is held on the Timetable, however the information does not currently include the student usernames which is required to import students into groups on Weblearn.
If it is not important that the student submissions are marked by their assigned tutor, it is recommended that you use Automatic Assignment Groups
To set up groups using the timetable information you will need to:
Create the groups using an import file:
- Download the import groups file from Weblearn
- Add required groups to import file
- Import the groups into the module
Prepare the student group data for import:
- Download the Gradebook from the Weblearn module
- Login to the timetable and export each group from the timetable system
- Copy the group data into the Gradebook file and add the group code
- Remove the instance value form the student numbers
- Use the xlookup formula to match each student and their group to their username
Import the students:
- Download the import group members file from Weblearn
- Copy the preprepared data into the import file
- Import the group members into the groups
Create the groups using an import file
- Open the ‘Groups’ tab at the top of the module
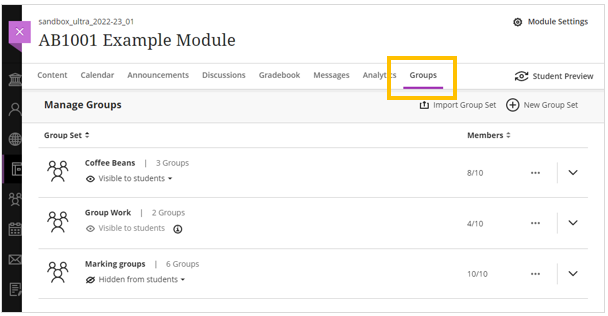
- Select the ‘Import Group Set‘ option

- Download the group creation template file by clicking on ‘Download Group Sets template‘

- Open the downloaded file and enter the values as shown in the example below. The Group Code should correspond to the CMIS Group, eg S1, S2 or T1, T2 etc
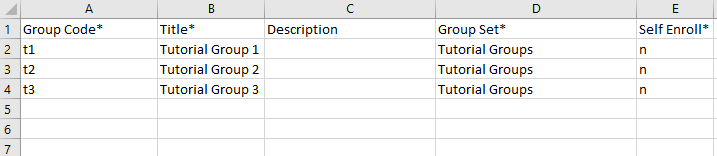
| Field | Value | Required |
| Group Code | The group code should be an abbreviated version of the group title and it must not contain special characters | Yes |
| Group Title | Enter the name for the group | Yes |
| Description | If required, enter the group description | No |
| Group Set | Enter the type of group that is being created eg Marking Group, Tutorial Group | Yes |
| Self Enrol | n | Yes |
- Save the changes you have made to the file
- In the Weblearn module, select ‘Upload file‘
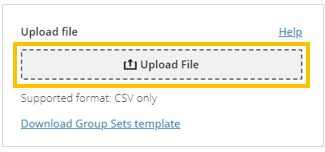
- Locate and select the file on your computer
- Once the file has attached, select ‘Import‘
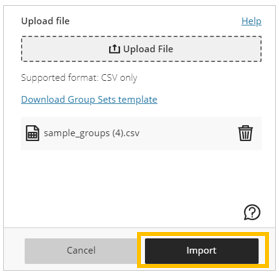
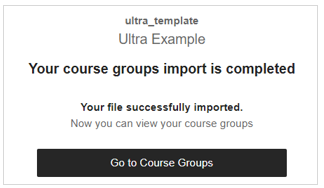
You need to refresh the Group Page to view the groups. Depending on the amount of groups you are creating, this can take a little while. Once the groups have been imported and are ready to be populated with students you will receive a confirmation email
Prepare the student group data for import
Export the student data from the Gradebook and timetable
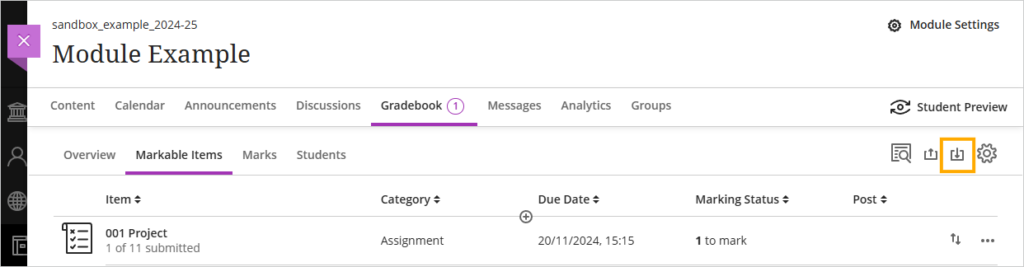
- Open the Gradebook tab inside your module and then click on the ‘Download’ icon
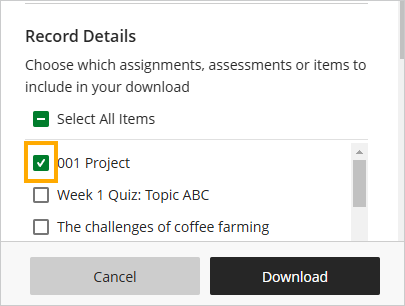
- On the Download marks panel, select one of the assessments by clicking on the checkbox next to the assessment name
Note: if you do not have any items to select you will need to create an assessment on the module first.
- Click on ‘Download’
- Open the downloaded file on your computer
- When you open the file you will see a message asking if you trust the file and wish to open it, click on ‘Yes’

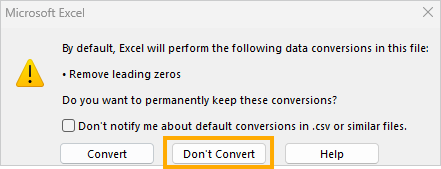
- Another message will be displayed asking if you would like to remove leading zeros, choose ‘Don’t convert’
The Gradebook file will contain a list of all students including their student number and username.
- At the bottom of the spreadsheet, click on the plus (+) to create a new sheet
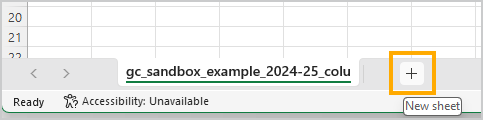
You will now need to download the timetable data and copy it into the new sheet.
To download the group from the timetable:
- Login to the Timetable system and locate the module you would like to export the group data for
Each group will need to be exported individually
- Click on the timetabled session and select ‘View attendee details’

- Click on the ‘Export’ button and download and open the export file

- Highlight all of the student numbers in column A, right click the data and select ‘Copy’
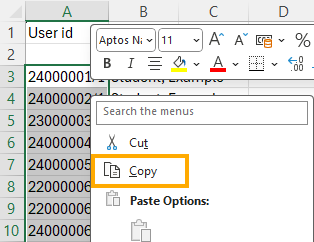
- Go to the new sheet in the Gradebook file and right click the A1 cell and select ‘Paste values’
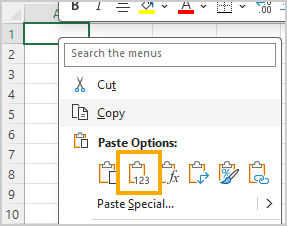
- In cell B1, enter the group code for the group of students – this must be the same code used in the group import file
- Click your mouse pointer on the bottom right of the B1 cell and then drag the mouse down the spreadsheet until you reach the end of the student numbers – this will copy the group code next to each student number
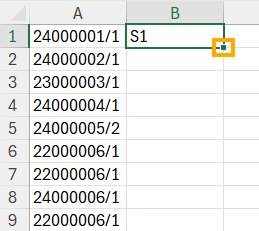
Note: use the Autofill options to ‘Copy Cells’
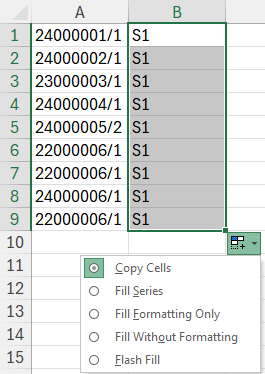
Repeat this process until the group data from all of the group export files has been added to the Gradebook file.
Remove the instance values from the student numbers
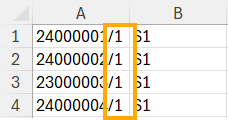
At the end of each student number there will be a slash and then another number which is not required and needs to be removed.
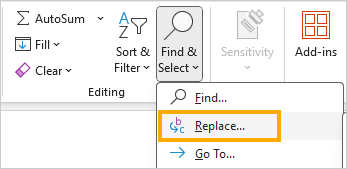
- On the excel tool bar click on the ‘Find & Select’ button and then select ‘Replace…’
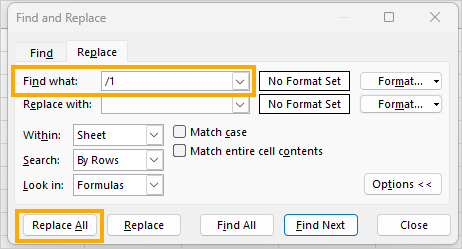
- In the ‘Find what’ field, type /1 and then click on the ‘Replace all’ button
You will see a message letting you know how many replacements were made.
- Click on ‘OK’
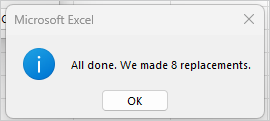
Some students will have /2 or /3 at the end of their student number, repeat the find and replace process to remove these values.
Use the Xlookup formula
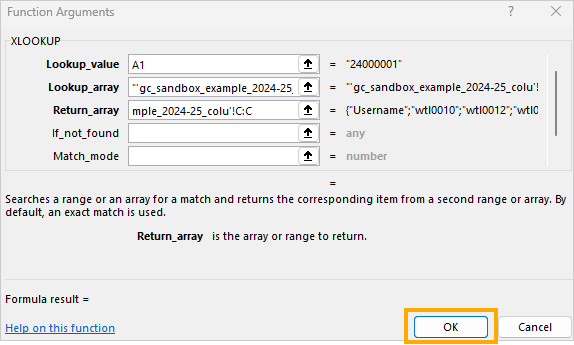
- In the gradebook file click on the C1 cell next the group data and then click on the ‘Formulas’ tab
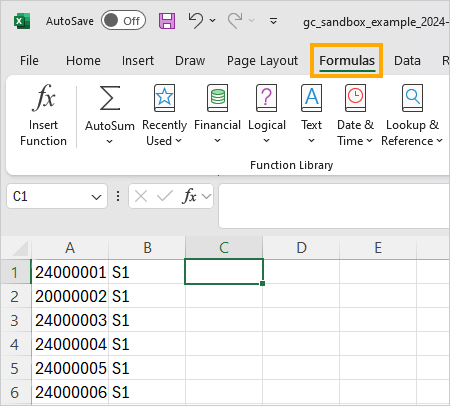
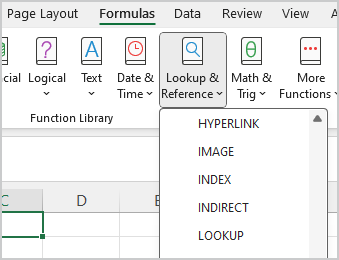
- Click on the ‘Lookup and Reference’ button and select xlookup form the list of options
- Set the Lookup_value to A1 by clicking on the A1 cell
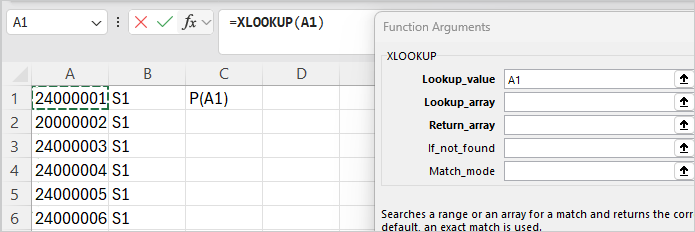
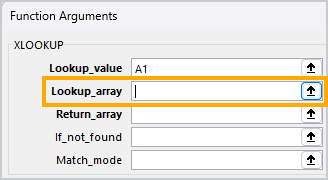
- On the Function arguments panel click into the Lookup_array field
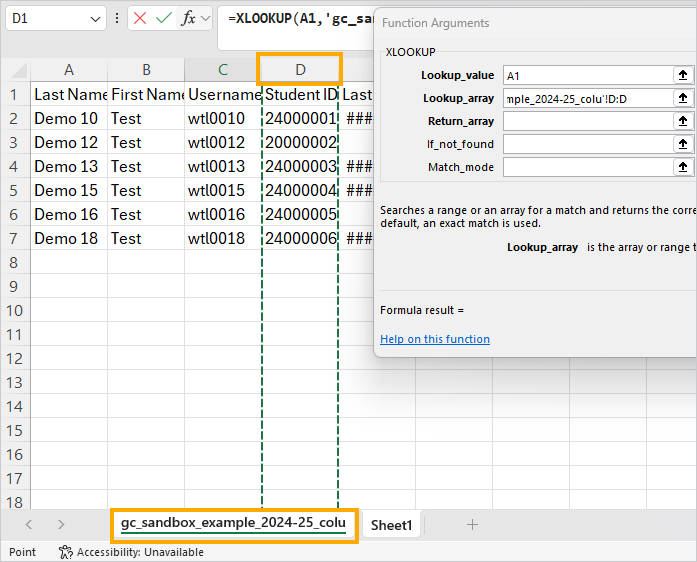
- Click on the Gradebook tab at the bottom of the spreadsheet to view the data
- Click on the Column D header to search all data from the Student ID column
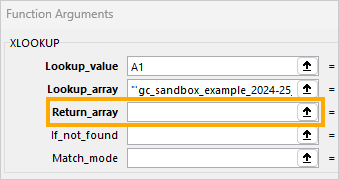
- Click on the ‘Return_array’ filed
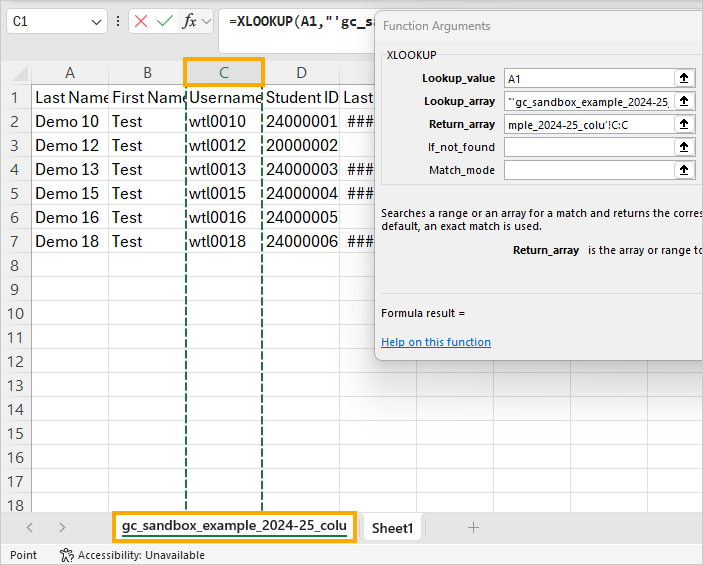
- Click on the Gradebook tab at the bottom of the spreadsheet again
- Click on the Column C header
- Click on ‘OK’
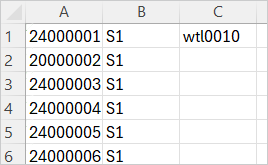
The student username will appear in column C next to the student ID and group code
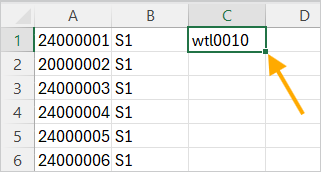
To copy the formula, click your mouse pointer on the bottom right of the cell and then drag the mouse down the spreadsheet until you reach the end of the student data
Import Group Membership
- To import students into groups, open the Groups page and locate the group or group set you want to add the students to
- Select the ‘More options‘ (three dots) icon, then select ‘Edit‘
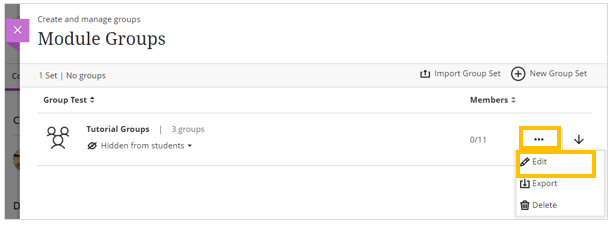
- Select the ‘Import Groups or Members’ icon
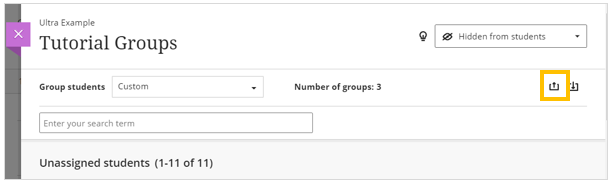
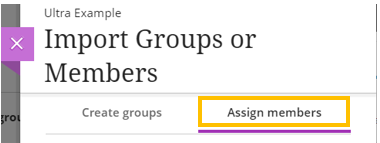
- Select the ‘Assign members‘ tab
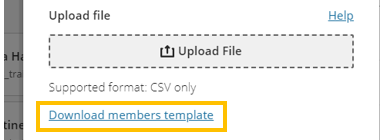
- Download the import students template file by selecting ‘Download members template‘
- Locate and open the downloaded file
On the Group members file, only the Group Code and the student User Name is required.
- Delete the columns which are not required
Go back to the Gradebook file which contains the group code and the student usernames
Select and copy the group code and username data
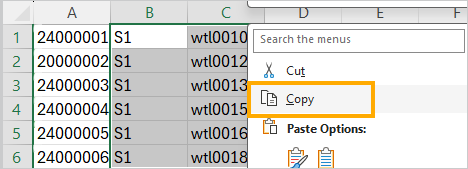
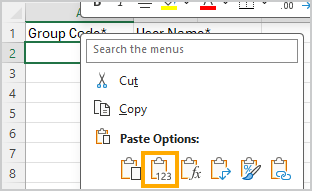
Go to the Assign Group Members file and right click the A2 cell and select the ‘Paste values’ option
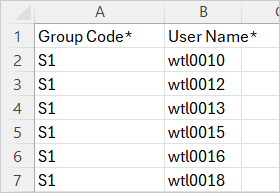
The group code and the usernames will appear in the file
- Save the changes you have made to the file
- In the Weblearn module, select ‘Upload file‘
- Locate and select the file on your computer
- Once the file has attached, select ‘Import‘
Once the students have been imported into their group you will receive a confirmation email.