
All online submission points must be set up in the relevant ‘Assessment component’ subfolder under the ‘Assessment’ folder of an Ultra module, including online submission points for resit or reassessment opportunities.
For more details see Assessment in Ultra
Create an Assignment
Create an additional ‘Assessment Component’ subfolder if required
Expand the ‘Assessment component’ folder where you want to add the Ultra Assignment
Click on the Plus (+) sign in the assessment component folder and select ‘Create’

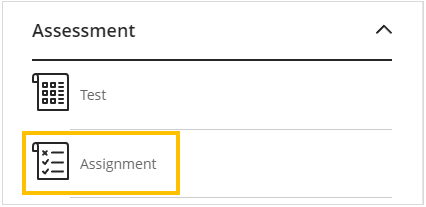
On the Create Item panel scroll down to the Assessments section and select ‘Assignment’
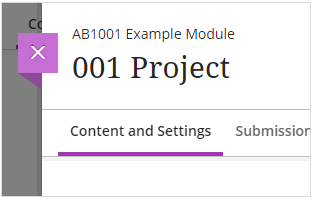
Add the name of the Ultra assignment using the naming convention for draft, on-time, resit or reassessment submission points, eg ‘001 Project’ for on-time or ‘001R Project (Resit)’ for resit submissions.
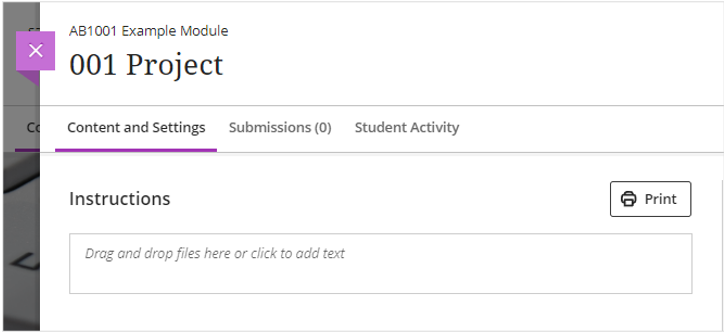
Add Assignment instructions for students in the Instructions field provided
You can now configure the assignment settings.
Assignment Settings
To access the Assignment Settings, click on the settings wheel icon to open the settings panel.

The assignment settings below provide the recommendations for
Summative assessments
- Select the tick box of a setting to select ‘Yes’
- Leave the tick box unticked to select ‘No’
The tables below show the recommended options for each section of the Ultra Assignment setting menu.
| Details & Information section | Recommended Option |
|---|---|
| Due Date | Due Date as shown on Evision at 3.15 pm |
| No Due Date | No |
| Prohibit late submissions | Yes |
| Prohibit new attempts after due date | Yes |
| Allow class conversations | Optional |
| Collect submissions offline | No |
Under the Submission details section you need to select the ‘Allowed format for online submissions’ option depending on what students need to submit.
| Submission format | Option |
|---|---|
| Files only (not including video files) | File upload |
| Video submissions and/or text only | Text entry |
| Submit video and/or text and files | File upload Text entry |
| Formative Tools section | Recommended Option |
|---|---|
| Formative assessment | No |
| Display formative label to students | No |
| Marks & Submission section | Recommended Option |
|---|---|
| Mark category | Assignment |
| Attempts allowed | 3 |
| Mark using | Points |
| Maximum points | 100 |
| Anonymous marking: Hide student names | Yes if appropriate for assessment type |
| Two markers per student | No |
| Peer review | No |
| Delegated Marking | Yes for modules with multiple markers |
| Assessment mark: Post assessment marks automatically | No |
| Additional Tools section | Recommended Option |
|---|---|
| Access code | Only use for in-class timed assessments |
| Time Limit | Only use for in-class timed assessments |
| Add marking rubric | Optional |
| Goals & standards Align with goals | No |
| Assign to groups | No Note: This is for Group submissions by students |
| Originality Report | For submissions which include word processed files or text, select ‘Enable Turnitin’ |
| Description | Add up to 750 characters that will appear on the assessment link only |
Formative submissions
- Select the tick box of a setting to select ‘Yes’
- Leave the tick box unticked to select ‘No’
The tables below show the recommended options for each section of the Ultra Assignment setting menu.
| Details & information section | Recommended Option |
|---|---|
| Due Date | as required, manually delete due date if not used |
| Prohibit late submissions | as required |
| Prohibit new attempts after due date | as required |
| Allow class conversations | Optional |
| Collect submissions offline | No |
| Formative Tools section | Recommended Option |
|---|---|
| Formative assessment | Yes |
| Display formative label to students | Yes |
| Marks & Submission section | Recommended Option |
|---|---|
| Mark category | Assignment |
| Attempts allowed | 3 |
| Mark using | Points |
| Maximum points | 100 |
| Anonymous marking: Hide student names | No |
| Two markers per student | No |
| Peer review | No |
| Delegated Marking | Yes if required for modules with multiple markers |
| Assessment mark: Post assessment marks automatically | No |
| Additional Tools section | Recommended Option |
|---|---|
| Access code | No |
| Time Limit | No |
| Add marking rubric | Optional |
| Goals & standards Align with goals | No |
| Assign to groups | No |
| Originality Report | For submissions which include word processed files or text, select ‘Enable Turnitin’ |
| Description | add up to 750 characters that will appear on the assessment link only |
Enable Turnitin
The ‘Enable Turnitin’ option will generate an originality report for all word processed files attached to the submission.
Under the Additional Tools section. select ‘Enable Turnitin’

Click on the ‘Enable Turnitin’ toggle
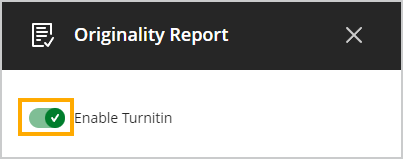
The Turnitin options will load in the side panel.
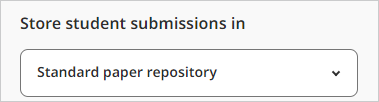
Under the ‘Store student submissions in’ dropdown menu ensure that the ‘Standard Paper Repository’ is selected.
The same paper submitted by the same student within the same module will not show as a match in the Turnitin Originality report.
Select all of the available source comparison options

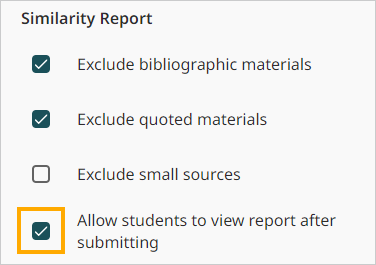
Optionally, choose the report exclusion options.
Select ‘Allow students to view report after submitting’
Students must be able to view their originality report if a report is generated on their submission.
Click on ‘Save’ to confirm the options.
Enable Delegated Marking
Delegated Marking allows the a module leader to assign staff to individual groups of students.
Once it has been set up, the member of the teaching team will only see the students in the group that have been assigned to them when they access the Ultra assignment.
Prerequisites:
- All staff with marking responsibilities have been added to the module as instructor or teaching assistant
- Marking groups have been created on the module and set to ‘visible’
Enable Delegated marking option in Assignment settings:
- Open the assignment settings
- Tick ‘Delegated Marking’ and the ‘Assign markers’ link will appear.
- Click on ‘Assign markers’

The Delegated Marking panel will open
To select group set for marking:
- Click on the ‘Select group set’ dropdown and select a Group Set that has been be set up and made visible on the module

Once the Group set has been selected, the panel will show an entry for each group with a search box to assign Markers
- Click on the search box under ‘Markers’ and enter a name

A dropdown will show the names of all staff enrolled on the module in a teaching role.
- Click on a name to assign the member of staff to a group for marking. If required multiple markers can be assigned to a group.

Once assigned, the marker will be listed under the group name.

Click on the ‘X’ next to the markers name to remove them as a marker if needed.
- Click on ‘Save’ to confirm the assigned markers
You must assign at least one marker to each group before you will be able to save.
Make Available to Students
Once you have set up the assignment and configured the settings, you will need to make the assignment link available to students.
